
Of course this blog post is also available as PDF for download.
The Nikon IR trigger has received a second helping. In Part 2 we had added a UDP connection to bridge larger distances via WiFi. With the help of a VL53L0X it is now possible to capture events in an adjustable distance window as triggers for the camera. Of course, the application is not limited to the camera, but can, with suitable actuators and drivers also be used for other controls. The sensor has already been described in the blog sequence Level sensor and previously in the post Theremin discussed. The VL53L0X is a so-called Time of Flight sensor (ToF). It emits laser pulses in the IR range and measures the "time of flight" until re-arrival after reflection at an obstacle. The accuracy is stated by the manufacturer to be 1mm, which may be true in laboratory environments. In real life and the reflection at not standardized surfaces, concerning color and structure, one brings it on approx. 1cm, which is completely sufficient in this case. Interest aroused? Then welcome to a new episode of
MicroPython on the ESP32 and ESP8266
today
Photo trigger with distance measurement
How to read an IR remote control, I have described in the first part in detail, as well as how to reproduce the IR pulses by software. The program in this post uses the method again trigger(), which was supplemented by the commands to switch on and off a LED (blue) at pin GPIO2. This LED thus indicates the triggering of a recording by a short flash of light. This already brings us to the required hardware. The use of the VL53L0X requires an ESP32 as processor, an ESP8266 is hopelessly overtaxed with the scope of the driver module for the ToF sensor.
Hardware
|
2 |
|
|
2 |
|
|
1 |
|
|
1 |
|
|
2 |
Resistor 330 Ω |
|
1 |
Resistor 220 Ω |
|
2 |
Resistance 1kΩ |
|
1 |
PNP transistor BC558 similar |
|
1 |
LED red |
|
1 |
LED green |
|
1 |
LED blue |
|
various |
|
|
2 |
|
|
1 |
Logic Analyzer optional |
The two buttons are used to set the distance range. An OLED display is helpful here, because the system should be able to work independently of the PC. The red and the green LED together with the display signal the action readiness and functionality of the buttons. The PNP transistor is controlled by a resistor of 1kΩ from pin GPIO17. It switches through when GPIO17 goes LOW and sets the base to collector potential. This activates the IR LED, which is connected to GND via a limiting resistor. Using the transistor, the IR LED can connect to the 5V operating voltage. This allows a higher energy supply and thus a greater range. The exact connections are shown in the circuit diagram.

Image 1: Distance sensor circuit
And here is the structure of the test circuit.

The software
For flashing and programming the ESP32:
Thonny or
SALEAE - Logic analyzer software for Windows 8, 10, 11
Used firmware for the ESP32:
ESP32 with 4MB Version 1.18 Status 03/25/2022
The version number is decisive for the implementation of the project.
The 1.18 is the only version that includes both the module bitstream module in the machines and at the same time supports the driver for the VL53L0X.
Through lengthy tests with different controllers and the firmware versions from 1.15 to 1.19, I have partly found serious differences concerning the driver support. The version 1.18 for example supports bitstream but unfortunately only a faulty PWM, which was corrected again in 1.19. On the other hand, the 1.19 with the VL53L0X only always delivers the same crappy measured value, which actually can't be a value, because the sensor can capture a maximum of 2000 mm and not 12000 plus! So the MicroPython developer crew keeps patching holes in the firmware to open new ones elsewhere. This sometimes leads to comments like: "Damn, that worked fine last month. Why doesn't it work now?" The answer is then (maybe?) that either the controller was changed in the setup or the firmware or both. But continuity is different!
The MicroPython programs for the project:
oled.py OLED front end
ssd1306.py OLED driver module
ir_trigger.py Test program for the trigger sequence
nikon_timer_nahfeld.py Operating software
buttons.py Driver for the buttons
VL53L0X.py Driver for the ToF sensor
MicroPython - Language - Modules and programs
For the installation of Thonny you find here a detailed manual (english version). In it there is also a description how the Micropython firmware (as of 02/05/2022) on the ESP chip. burned is burned.
MicroPython is an interpreter language. The main difference to the Arduino IDE, where you always and only flash whole programs, is that you only need to flash the MicroPython firmware once at the beginning to the ESP32, so that the controller understands MicroPython instructions. You can use Thonny, µPyCraft or esptool.py to do this. For Thonny, I have described the process here described here.
Once the firmware is flashed, you can casually talk to your controller one-on-one, test individual commands, and immediately see the response without having to compile and transfer an entire program first. In fact, that's what bothers me about the Arduino IDE. You simply save an enormous amount of time if you can do simple tests of the syntax and the hardware up to trying out and refining functions and whole program parts via the command line in advance before you knit a program out of it. For this purpose I also like to create small test programs from time to time. As a kind of macro they summarize recurring commands. From such program fragments sometimes whole applications are developed.
Autostart
If you want the program to start autonomously when the controller is switched on, copy the program text into a newly created blank file. Save this file as boot.py in the workspace and upload it to the ESP chip. The program will start automatically at the next reset or power-on.
Test programs
Manually, programs are started from the current editor window in the Thonny IDE via the F5 key. This is faster than clicking on the Start button, or via the menu Run. Only the modules used in the program must be located in the flash of the ESP32.
In between times Arduino IDE again?
If you want to use the controller together with the Arduino IDE again later, simply flash the program in the usual way. However, the ESP32/ESP8266 will then have forgotten that it ever spoke MicroPython. Conversely, any Espressif chip that contains a compiled program from the Arduino IDE or the AT firmware or LUA or ... can easily be flashed with the MicroPython firmware. The process is always like here described.
Static methods
Some months ago I had written a module for capturing keys for an application. In it there were some methods that were needed for all keys. These methods were implemented as instance methods, so each key element contained the same sequences. With many keys this wastes memory and so for this project I reworked the module and made the instance methods static methods. They are now stored only once in memory and used by all keys. How is this related? I explain it with the static method buttons.getTouch() and the instance method buttons.Buttons.ledOn() from the class Buttons.
def getTouch(touch):
    v=button.tpin.value()
    if key.invert:
        v=(False if v else True)
    return (True if v==1 else False)
The method getTouch() is defined in the module buttons.py but outside the class Buttons class. To make it a static method, I use the decorator function inside the class definition staticmethod(). This makes getTouch() is made known within the Buttons class and can now also be referenced by objects of the Buttons class.
getTouch=staticmethod(getTouch)
Crucially, static methods do not have an automatic reference to an object of the class. For instance methods, this reference is provided by the prefix self for objects or by the parameter self for methods. While instance methods within the class definition can also be created with a preceding self the self is omitted for static methods.
Any key object created via the constructor of the class Buttons is also assigned an LED via a pin object, among other attributes. For switching on and off I use the instance methods ledOn() and ledOff(), which query the presence of an LED and the activity status before being operated.
With this getTouch(key) can retrieve the state of a button, I need to get its instance via the parameter touch as an argument. The situation is different with the instance method ledOn(). Because the method is bound to a button object, it also knows which LED must be switched.
While getTouch() exists only once in memory, there are just as many sequences of ledOn() as there are key instances.
When I buttons.py in the editor window, it is executed as the main program and therefore not only the static method getTouch() is defined, but at the end also the key objects t and s instantiated.
if __name__ == "__main__":
    i2c=SoftI2C(scl=Pin(22),sda=Pin(21),freq=100000)
    from oled import OLED
    d=OLED(i2c)
    t=Buttons(23,invert=True,name="UP.,ledPin=18,active=1,d=d,x=0,y=1)
    s=Buttons(19,invert=True,name="DOWN,ledPin=5,active=1,d=d,x=0,y=1)
Now let's examine the following:
>>> t.getTouch
<function getTouch at 0x3ffe5240>
>>> s.getTouch
<function getTouch at 0x3ffe5240>
We can see that in both cases the function definition is found in the same memory location.
>>> t.ledOn
<bound_method>

Image 3: Object inspector t
>>> s.ledOn
<bound_method>
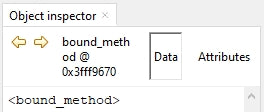
Image 4: Object inspector s
In the object inspector, which I can access via the menu View - Object inspector menu, I can convince myself that ledOn() for t and s is located at different memory positions.

Image 5: View object inspector
Similarly, the functions anyKey(), getValue(), TimeOut(), counter(), waitForAnyKey(), waitForTouch() and waitForRealease() are defined as static methods. The API of the module buttons is defined in the program text buttons.py briefly described.
The program
The main program itself is not spectacular with just under 20 lines. In the main loop the distance is measured five times in a continuous run and from this an average value in the dimension cm is calculated. Because the values of the VL53L0X module are supplied in mm, this results in the divisor 50.
If this measured value lies in the distance window between the lower value bottom and the upper value topthen a total of three photos are triggered at intervals of 2 seconds. This is followed by a pause of 4 seconds so that the images can also be stored safely. The display informs about the respective phase, RUNNIG or PAUSE.
The end of the loop is the query of the flash key at the ESP32 module. The program is aborted if the key was pressed.
We look at the rest from top to bottom. We start with the import of the necessary modules, classes and methods.
# nikon_timer_nahfeld.py
#
import sys
from time import sleep_ms,ticks_ms, sleep_us
from machine import SoftI2C, Pin, bitstream
from oled import OLED
from ssd1306 import SSD1306_I2C
import VL53L0X
import buttons
SCL=Pin(22)
SDA=Pin(21)
i2c=SoftI2C(SCL,SDA)
d=OLED(i2c)
button=Pin(0,Pin.IN)
on=buttons.Buttons(23,invert=True,name="UP.,ledPin=18,active=1,d=d,x=0,y=1)
from=buttons.Buttons(19,invert=True,name="DOWN,ledPin=5,active=1,d=d,x=0,y=1)
keys=(at,from)
timeout=buttons.Buttons.TimeOut
out=Pin(17,Pin.OUT,value=0) # IR LED
control=Pin(2,Pin.OUT,value=0) # Control LED
tof = VL53L0X.VL53L0X(i2c)
tof.set_Vcsel_pulse_period(tof.vcsel_period_type[0], 18)
tof.set_Vcsel_pulse_period(tof.vcsel_period_type[1], 14)
The I2C bus gets its pins assigned and with the i2c object the OLED object d is instantiated. This needs the module ssd1306which is used together with buttons, oled and VL53L0X must be uploaded to the flash of the ESP32.
As an abort button, I define the flash button at GPIO0, further the button instances at and down. The key modules KY-004 are LOW active, so I set the parameter invert to True. The method getTouch() returns a 1 when the key is pressed. The keys are assigned names and an LED. I also pass the display object d and the positions where button control outputs should appear. I group the button instances in the tuple keys together, so that I can use the methods anyKey() and waitForAnyKey() can handle both keys in one wash.
So that the Closure TimeOut can be called shorter, I define for the static method the alias timeout.
The IR-LED gets the GPIO17 as output and the control LED is connected to GPIO2. On the ESP32S you can save this LED because there is already a HIGH active blue LED on the board. The ESP32 Dev Kit V4 has no onboard LED.
The declaration of the ToF sensor completes the preparations.
A challenge was the configuration of the "hot" range for the distance. Lower and upper limit should be adjustable and reconfigurable only by two buttons. Because the range has after all 200 adjustable steps, a single and a multi-step mode should be implemented.
The function config() does this together with the module buttons.py and the display quite well. Another ingredient brings the non-blocking software timer TimeOut(), which ensures that the last set value is automatically taken over after a certain time without key actuation. After each key operation, depending on the number of the key, 0 or 1, the limit value is counted up or down and then the expiry timer is reset. The line
key=buttons.waitForAnyKey(keys,300)
waits for a key press, inserts a short delay and returns the key number. If a key is pressed continuously, then the while loop switches to turbo mode after the 5th pass. From 1, the step size is then increased to 5. With each pass the counter value is displayed. If no key is pressed, the step size is reduced to 1 again.
After bottom and top are set, the two values are stored as plain text in the file config.txt file. The with-statement ensures that the file is automatically closed after the block has passed.
def config(delay=300):
    global bottom, top
    d.clearAll()
    d.writeAt("NIKON-TIMER",2,0,False)
    d.writeAt("UNDERBORDER:",1,1,False)
    d.writeAt("{}".format(bottom),4,2,False)
    d.writeAt("UP/DOWN/None",3,3)
    end = timeout(5000)
    sleep_ms(500)
    while not end():
        taste=buttons.waitForAnyKey(keys,300)
        if key is not None:
            n+=1
            if n<5:
                bottom=(bottom+1 if button==0 else bottom-1)
            else:
                bottom=(bottom+5 if button==0 else bottom-5)
            d.writeAt("{}   ".format(bottom),4,2)
            sleep_ms(delay)
            end=timeout(5000)
        else:
            n=0
    d.clearAll()
    d.writeAt("NIKON-TIMER",2,0,False)
    d.writeAt("TOP LIMIT:",1,1,False)
    d.writeAt("{}   ".format(top),4,2)
    d.writeAt("UP/DOWN/None",3,3)
    end = timeout(5000)
    while not end():
        taste=buttons.waitForAnyKey(keys,300)
        if key is not None:
            n+=1
            if n<5:
                top=(top+1 if taste==0 else top-1)
            else:
                top=(top+5 if taste==0 else top-5)
            d.writeAt("{}   ".format(top),4,2)
            sleep_ms(delay)
            end=timeout(5000)
        else:
            n=0
    with open("config.txt","w") as f:
        f.write("{}\n".format(bottom))
        f.write("{}\n".format(top))
The function trigger() reproduces the pulse train of the official Nikon IR control. It was defined in the first part already described in detail. There it is also explained how to sample a serial IR signal with the help of a logic analyzer and an IR receiving diode.
def read out():
    control.value(1)
    bitstream(out,0,(0,0,13160,13160),(b'\xff'*9)+b'\xf0')
    out(1)
    sleep_us(27800)
    bitstream(out,0,(0,0,13160,13160),(b'\xff'*1)+b'\xfe')
    out(1)
    sleep_us(1580)
    bitstream(out,0,(0,0,13160,13160),(b'\xff'*1)+b'\xfe')
    out(1)
    sleep_us(3480)
    bitstream(out,0,(0,0,13160,13160),(b'\xff'*1)+b'\xfe')
    out(1)
    sleep_us(63100)
    control.value(0)
At each program start it is checked whether the file config.txt exists. If it does, then the values for bottom and top are read in. Otherwise default values are set and saved. I catch an error when opening or reading the file with try - except intercept.
# Read or set the configuration
try:
    with open("config.txt","r") as f:
        bottom=int(f.readline())
        top=int(f.readline())
except:
    bottom=20 # cm
    top=60    # cm
    with open("config.txt","w") as f:
        f.write("{}\n".format(bottom))
        f.write("{}\n".format(top))
The display is cleared and then informs about the next steps. The parameter for the waiting time (delay) of the method waitForAnyKey() is preset to 5 seconds and therefore need not be specified.
d.clearAll()
d.writeAt("NIKON-TIMER",2,0,False)
d.writeAt("UP button",3,2,False)
d.writeAt("to run config",1,3)
d.writeAt("DOWN button",2,4,False)
d.writeAt("to start",4,5)
# wait 5 seconds for key
if buttons.waitForAnyKey(keys) == 0:
    config(300)
Then I start the VL53L0X process. The display shows RUNNING and outputs the limit values. After that the main loop of the application begins, which we have already discussed.
Finally the entire program that you can download in the context.
# nikon_timer_nahfeld.py
#
import sys
from time import sleep_ms,ticks_ms, sleep_us
from machine import SoftI2C, Pin, bitstream
from oled import OLED
from ssd1306 import SSD1306_I2C
import VL53L0X
import buttons
SCL=Pin(22)
SDA=Pin(21)
i2c=SoftI2C(SCL,SDA)
d=OLED(i2c)
button=Pin(0,Pin.IN)
on=buttons.Buttons(23,invert=True,name="UP.,ledPin=18,active=1,d=d,x=0,y=1)
from=buttons.Buttons(19,invert=True,name="DOWN,ledPin=5,active=1,d=d,x=0,y=1)
keys=(at,from)
timeout=buttons.Buttons.TimeOut
out=Pin(17,Pin.OUT,value=0) # IR LED
control=Pin(2,Pin.OUT,value=0) # Control LED
tof = VL53L0X.VL53L0X(i2c)
tof.set_Vcsel_pulse_period(tof.vcsel_period_type[0], 18)
tof.set_Vcsel_pulse_period(tof.vcsel_period_type[1], 14)
def config(delay=300):
global bottom, top
d.clearAll()
d.writeAt("NIKON-TIMER",2,0,False)
d.writeAt("UNDERBORDER:",1,1,False)
d.writeAt("{}".format(bottom),4,2,False)
d.writeAt("UP/DOWN/None",3,3)
end = timeout(5000)
sleep_ms(500)
while not end():
taste=buttons.waitForAnyKey(keys,300)
if key is not None:
n+=1
if n<5:
bottom=(bottom+1 if button==0 else bottom-1)
else:
bottom=(bottom+5 if button==0 else bottom-5)
d.writeAt("{} ".format(bottom),4,2)
sleep_ms(delay)
end=timeout(5000)
else:
n=0
d.clearAll()
d.writeAt("NIKON-TIMER",2,0,False)
d.writeAt("TOP LIMIT:",1,1,False)
d.writeAt("{} ".format(top),4,2)
d.writeAt("UP/DOWN/None",3,3)
end = timeout(5000)
while not end():
taste=buttons.waitForAnyKey(keys,300)
if key is not None:
n+=1
if n<5:
top=(top+1 if taste==0 else top-1)
else:
top=(top+5 if taste==0 else top-5)
d.writeAt("{} ".format(top),4,2)
sleep_ms(delay)
end=timeout(5000)
else:
n=0
with open("config.txt","w") as f:
f.write("{}\n".format(bottom))
f.write("{}\n".format(top))
def trigger():
control.value(1)
bitstream(out,0,(0,0,13160,13160),(b'\xff'*9)+b'\xf0')
out(1)
sleep_us(27800)
bitstream(out,0,(0,0,13160,13160),(b'\xff'*1)+b'\xfe')
out(1)
sleep_us(1580)
bitstream(out,0,(0,0,13160,13160),(b'\xff'*1)+b'\xfe')
out(1)
sleep_us(3480)
bitstream(out,0,(0,0,13160,13160),(b'\xff'*1)+b'\xfe')
out(1)
sleep_us(63100)
control.value(0)
# Read or set the configuration
try:
with open("config.txt","r") as f:
bottom=int(f.readline())
top=int(f.readline())
except:
bottom=20 # cm
top=60 # cm
with open("config.txt","w") as f:
f.write("{}\n".format(bottom))
f.write("{}\n".format(top))
d.clearAll()
d.writeAt("NIKON-TIMER",2,0,False)
d.writeAt("UP button",3,2,False)
d.writeAt("to run config",1,3)
d.writeAt("DOWN button",2,4,False)
d.writeAt("to start",4,5)
# wait 5 seconds for key
if buttons.waitForAnyKey(keys) == 0:
config(300)
# Start VL53L0X
tof.start()
print("started")
d.clearAll()
d.writeAt("NIKON-TIMER",2,0,False)
d.writeAt("RUNNING",4,2,False)
d.writeAt("UG = {} cm".format(bottom),2,3,False)
d.writeAt("OG = {} cm".format(top),2,4)
while True:
distance=0
for i in range(5):
distance=distance+tof.read()
distance=(distance+5)//50
if (bottom <= distance <= top):
for i in range(3):
trigger()
print("Photo {} at {} cm".format(i,distance))
sleep_ms(2000)
d.writeAt("PAUSE ",4,2)
sleep_ms(4000)
d.writeAt("RUNNING",4,2)
sleep_ms(50)
if key.value()==0:
d.clearAll()
d.writeAt("NIKON-TIMER",2,0,False)
d.writeAt("TERMINATED",3,2)
sys.exit()


5 comentarios
Andreas Wolter
@Detlef: den Fehler haben wir korrigiert. Eventuell mal die Seite aktualisieren. Die URL dürfte im Dateinamen keine Großbuchstaben enthalten.
Grüße,
Andreas Wolter
AZ-Delivery Blog
Detlef
Der PDF-Link ergibt leider ein 404 Error.
Andreas Wolter
danke für den Heinweis. Es war lediglich ein Problem mit Klein- und Großbuchstaben. Der Link zum PDF funktioniert nun.
Grüße,
Andreas Wolter
AZ-Delivery Blog
thor midgard
>>Natürlich gibt diesen Blogbeitrag auch als PDF zum Download.
Funktioniert leider nicht. Ansonsten sehr lehrreich.
LG Thor
Gerd
Der Link zur PDF Datei läuft ins leere.
Not Found
The requested URL was not found on this server.