This article is also available as a PDF document.
If you want to virtually extend the cable between the temperature and humidity sensor HTU21 and the matrix display, or if you want a different character set for your matrix display, you are in the right place. I will tell you how to convert a TTF character set from Windows to a MicroPython character set and we will replace the cable easily by radio transmission.

ESP8266-01 as temperature and humidity transmitter
Welcome to
MicroPython on the ESP32 and ESP8266
today
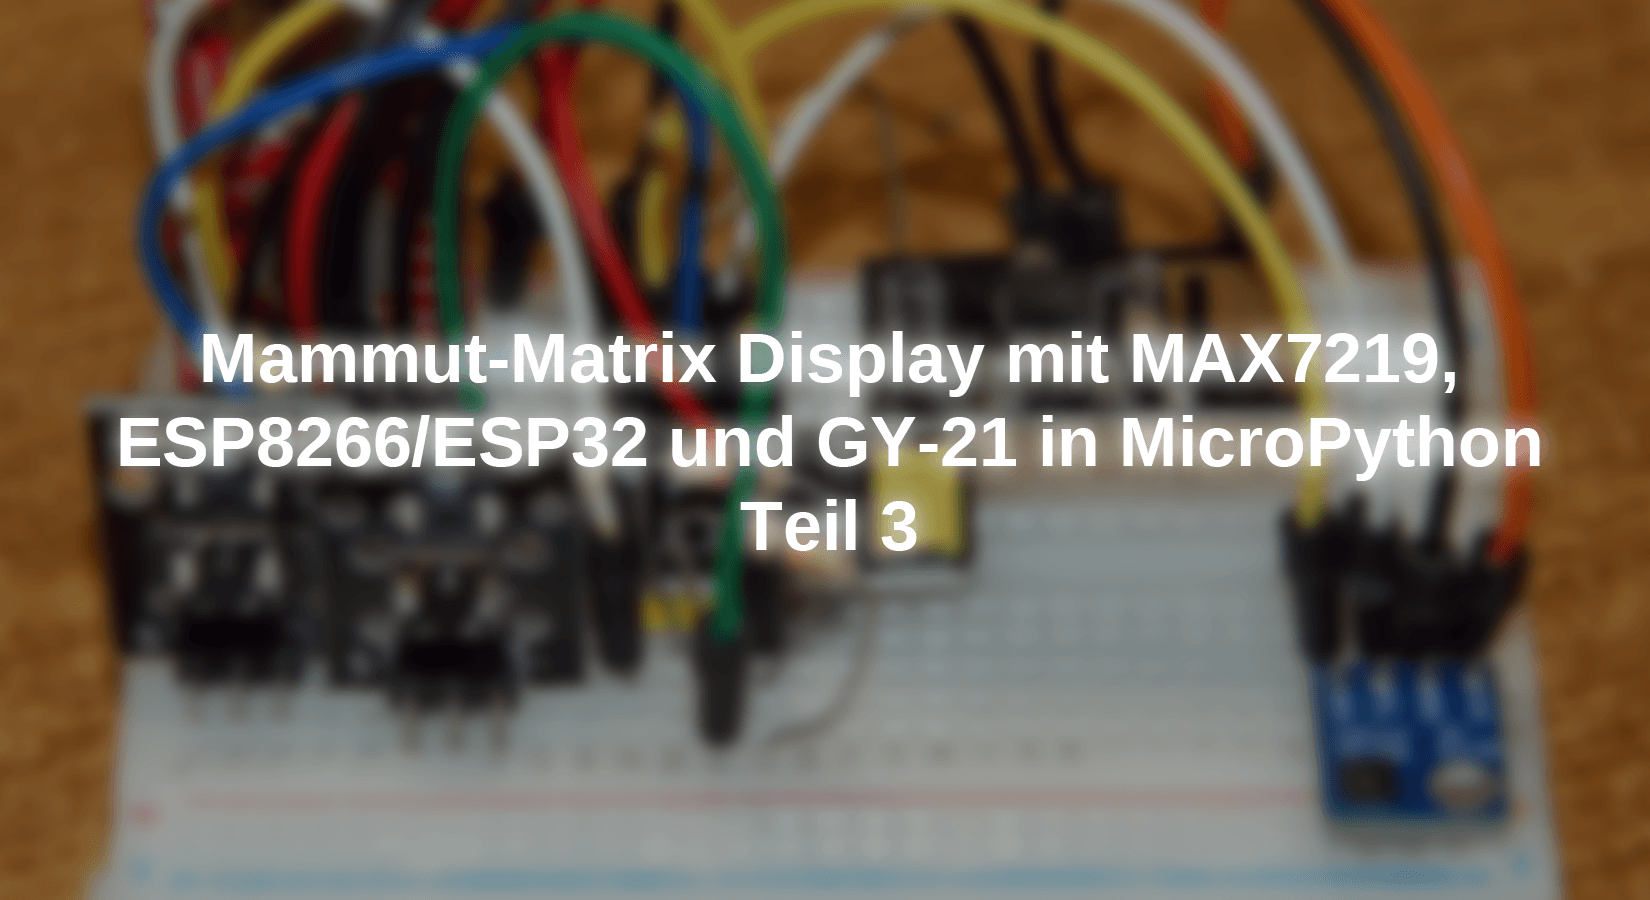
Mammoth matrix display of the HTU21 and WLAN
I'll start with the hardware. You can read more about the Mammut Matrix Display and the corresponding controller in the first part of this series. There you will find the schematic and a description of the operation of the display. Furthermore a MicroPython module for controlling the display was developed, which can and will be used in further projects.
In the second part was about the temperature and humidity sensor HTU21 alias SHT21. For the control also a MicroPython module was built. Besides you will learn more about the operation of the I2C bus and it is shown how to make the bus signals visible with inexpensive means. The used 8-channel Logicanalyzer is perfectly suitable for this. Furthermore there is information about the CRC checksum calculation.
In this episode we reuse all parts used so far. However, to build a radio link, a second controller is needed. All members of the ESP32/ESP8266 families come into question, even an ESP8266-01 can do the sensor and transmitter part. And exactly with this one I prepared the current post.
Hardware
|
1 |
D1 Mini NodeMcu with ESP8266-12F WLAN module or NodeMCU Lua Amica Module V2 ESP8266 ESP-12F |
|
1 |
|
|
1 |
|
|
1 |
|
|
2 |
|
|
1 |
Resistor 10kΩ |
|
1 |
|
|
|
or instead |
|
1 |
NodeMCU Lua Amica Module V2 ESP8266 ESP-12F WIFI WLAN unsoldered with CP2102 |
|
as needed |
|
|
various |
|
|
1 |
Breadboard Kit - 3 x 65pcs Jumper Wire Cable M2M and 3 x Mini Breadboard 400 Pins |
|
1 |
Plywood strips 5x 25cm ... for display mounting |
The circuit for the ESP8266-01S seems to be more complex, because boards are needed, which for example have an Amica already on the board. In the end, when development and programming are done, only the ESP8266-01S and the module GY21 with the HTU21 remain in operation. The power supply can also be replaced by two AA batteries. The connection is then made to the 3.3V pins and GND.

Image 1: SHT21-UDP client

Image 2: SHT-UDP client with ESP8266 node MCU
Besides the hardware, there is one more preparatory step needed for this blog sequence. It is about slimmer character sets to fit more information into the display. How you get to that, I explain in the following chapter.
Cloning Windows fonts for use in MicroPython
Software used:
How it is made
To transfer a vector font from Windows to pixel format, we use a freeware by Peter Hinch, which is subject to MIT license. It is called micropython-font-to-py and is distributed as a ZIP file from Git Hub downloaded.

Image 3: Software download from Github
For the installation I created the directory font2py in the root directory of my hard disk F:. By the way, this and everything else also works together with a USB stick if you want to keep your hard disk clean.
The file micropython-font-to-py-master.zip I have created in F:\font2py and also unpacked it there.

Image 4: After unpacking
The resulting directory micropython-font-to-py-master I have created in f2p the name was too long for me. Let's change to this directory now. The two Python programs font_to_py.py and font_test.py will be used shortly. Before that we will create a directory sources directory.

Image 5: Working environment
Now open the Windows font folder, C:\Windows\Fonts. Look for a font shape that is as clear as possible and copy the file to the directory F:\font2py\f2p\sources. I have here FRADM.TTF selected.

Image 6: Open Powershell window
The next two steps take place in a Powershell window. We open the context menu with pressed Shift key (Shift) and a right click on the folder f2y and select Open Powershell window here. The prompt shows us that we are in the correct directory. Then we issue the following command:
.\font_to_py.py F:\font2py\f2p \sources\FRADM.TTF 7 -x franklin8.py
Please note that the command must be prefixed with a ".\" to be found in the current path environment. - No, the 7 is already correct here. With an 8 as character height would be font_to_py.py would generate a font with 9 pixels height. Why? This is probably due to the mysterious interaction of TTF font and font_to_py.py. With other fonts it works as expected - Youth researches!

Image 7: The first MicroPython character set
We have just created the character set FRADM.TTF with 7 pixel character height into a Python file. The switch -x makes sure that character information is stored line by line. This is important because our matrix display wants it that way. A proportional character set is also implemented with variable character widths using our specifications. If you prefer equal character widths, just add the switch -f switch in the command line.
Of course we are interested in what the character set looks like.
.\font_test.py franklin8 "0123456789"

Image 8: Font test
The TTF font was placed in a MicroPython module franklin8.py, which we placed in the folder F:\font2py\f2p folder. For further use, it must be copied to Thonny's working directory.
The software for the radio measuring station
For flashing and programming the ESP32:
Thonny or
Used firmware for the ESP8266/ESP32:
Please choose a stable version
ESP8266 with 1MB Version 1.18 Status: 25.03.2022 or
ESP32 with 4MB Version 1.18 Status: 25.03.2022
The MicroPython programs for the project:
matrix8x8.py Driver module for the MAX7219
matrixtest.py Demo program for an x by 8 matrix display
sht21.py Driver module for the GY-21 module
sht21_32_test.py Test program for the ESP32
sht21_8266_test.py Test program for the ESP8266
shtdisplay.py Thermo- Hygrometer Software with Writer
shtdisplay+.py Thermo- Hygrometer Software with Writer
WLANdisplay.py Display unit with WLAN connection
APdisplay.py Display unit with own access point
sht21client.py Program for the HTU21 client
writer.py The driver for the display with the new characters.
Other software:
Packet transmitter Download page
Packet transmitter Windows Install Version
Packet Sender Windows Portable
Packet Sender Linux
MicroPython - Language - Modules and Programs
For the installation of Thonny you find here a detailed manual (english version). In it there is also a description how the MicropythonFirmware (as of 02/05/2022) on the ESP chip is burned .
MicroPython is an interpreter language. The main difference to the Arduino IDE, where you always and only flash whole programs, is that you only need to flash the MicroPython firmware once at the beginning to the ESP32, so that the controller understands MicroPython instructions. You can use Thonny, µPyCraft or esptool.py to do this. For Thonny, I have described the process here described here.
At this point a few words about flashing the ESP8266-01: Unlike its bigger siblings, the ESP8266-01 does not have an automatic flashing function on board. Manual work is required here.
The flash process is divided into two parts, first erase flash memory and second transfer firmware. The following list is an excerpt from the Description for the flash process:
- a) Complete the preparations in Thonny
- b) Press reset and flash button
- c) Start the flash process in Thonny
- d) Release reset key, hold flash key until progress is displayed
- e) Release flash key
- f) Wait until access to the COM interface is reported again.
- g) Then run through points b) to f) again and
- h) Finally, close the installer window and exit the options with OK.
Once the firmware is flashed, you can casually talk to your controller one-on-one, test individual commands, and immediately see the response without having to compile and transfer an entire program first. In fact, that's what bothers me about the Arduino IDE. You simply save an enormous amount of time if you can do simple tests of the syntax and the hardware up to trying out and refining functions and whole program parts via the command line in advance before you knit a program out of it. For this purpose I also like to create small test programs from time to time. As a kind of macro they summarize recurring commands. From such program fragments sometimes whole applications are developed.
Autostart
If you want the program to start autonomously when the controller is switched on, copy the program text into a newly created blank file. Save this file as boot.py in the workspace and upload it to the ESP chip. The program will start automatically at the next reset or power-on.
Test programs
Manually, programs are started from the current editor window in the Thonny IDE via the F5 key. This is quicker than clicking on the Start button, or via the menu Run. Only the modules used in the program must be in the flash of the ESP32.
In between times Arduino IDE again?
If you want to use the controller together with the Arduino IDE again later, simply flash the program in the usual way. However, the ESP32/ESP8266 will then have forgotten that it ever spoke MicroPython. Conversely, any Espressif chip that contains a compiled program from the Arduino IDE or the AT firmware or LUA or ... can easily be flashed with the MicroPython firmware. The process is always like here described.
The character set test
After all the preparations, it's time to get serious. Let's first test the new character set. In the module FrameBuffer module, from which our class MATRIX already contains a character set, which is accessed by the method FrameBuffer.text() accesses. If we want to add one, or more character sets, we also need a separate driver for this, if the firmware MicroPython should not or cannot be recompiled. Because somehow the pixel information has to get into the framebuffer. Such a driver has Peter Hinch in his package micropython-font-to-py-master package.
I now have the said driver file named writer.py a little bit to adapt it to my needs. Furthermore I have added two routines so that the commands roll() and center() are available. For the changes to take effect, you must not use writer.py from the micropython-font-to-py-master package, but use this one. As a module, the file must be uploaded to the flash of the controller, as well as the font file itself.
After opening the file shtdisplay+.py in an editor window, we start the program with F5. In a 3-second cycle, a 7-digit temperature display is shown in a 4-digit display. The typeface of the converted fonts partly needs getting used to, partly you can forget it. It is now up to you to select a good usable font from the Windows font folder. Figure 9 shows a Amica Node-MCU 3 is used as controller for the display.

Image 9: Temperature display 7-digit in 4-digit display
The following digits in the modified program shtdisplay+.py compared to the one from the previous blog post shtdisplay.py I have highlighted in the listing.
# _shtdisplay.py
import sys, os
from time import sleep_ms,sleep
from matrix8x8 import MATRIX
from machine import Pin, SoftI2C, SPI
from i2cbus import I2CBus
from sht21 import SHT21
import franklin8 as charset
from writer import Writer
chip=sys.platform
if chip == 'esp8266':
# pin translator for ESP8266 boards
# LUA pins D0 D1 D2 D3 D4 D5 D6 D7 D8
# ESP8266 pins 16 5 4 0 2 14 12 13 15
# SC SD
bus = 1
MISOp = Pin(12) # D6
MOSIp = Pin(13) # D7
SCKp = Pin(14) # D5
spi=SPI(1,baud rate=4000000) #ESP8266
# # alternatively virtual with bitbanging
# spi=SPI(-1,baudrate=4000000,sck=SCK,mosi=MOSI,\
# miso=MISO,polarity=0,phase=0) #ESP8266
CSp = Pin(16, mode=Pin.OUT, value=1) # D0
SCL=Pin(5) # D1
SDA=Pin(4) # D2
elif chip == 'esp32':
bus = 1
MISOp= Pin(15)
MOSIp= Pin(13)
SCKp = Pin(14)
spi=SPI(1,baud rate=10000000,sck=Pin(14),mosi=Pin(13),\
miso=Pin(15),polarity=0,phase=0) # ESP32
CSp = Pin(4, mode=Pin.OUT, value=1)
SCL=Pin(21)
SDA=Pin(22)
button=Pin(0,Pin.IN,Pin.PULL_UP)
blinkLed=Pin(2,Pin.OUT)
else:
# blink(led,800,100,inverted=True,repeat=5)
raise OSError ("Unknown port")
print("Hardware bus {}: Pins fixed"..format(bus))
print("MISO {}, MOSI {}, SCK {}, CS{}".format(MISOp,MOSIp,SCKp,CSp))
print("SCL {}, SDA {}\n".format(SCL,SDA))
numOfDisplays=4
d=MATRIX(spi,CSp,numOfDisplays)
i2c=SoftI2C(SCL,SDA)
sleep_ms(15) # for booting SHT device
s=SHT21(i2c)
w = Writer(d, charset)
print("Install done")
delay=3
while 1:
w.setTextPos( 0, 0)
s.readTemperatureRaw()
tempString="{0:5.1f} C"
humString="{0:4.1f} %"
s.calcTemperature()
print(s.Temp,"°C")
w.printString(tempString.format(s.Temp))
d.show()
sleep(delay)
d.clear()
w.setTextPos( 0, 0)
s.readHumidityRaw()
s.calcHumidity()
print(s.Hum,"%RH")
w.printString(humString.format(s.Hum))
d.show()
sleep(delay)
d.clear()
The class Writer is imported and instantiated. Thereby I transfer the previous display object d. The Writer object w accesses via d to the class FrameBuffer to it. We use the two drivers in parallel to each other and thus use the synergy effects.
Before moving on to the radio section, a note about the original driver by Peter Hinch. He designed the program to allow multiple fonts in the same application. Therefore his set_textpos() function is cross-instance with the decorator @staticmethod across all instances. After all, each font driver accesses the same display and needs to know where it or another driver stopped writing. Only a function that is accessible to all instances can ensure this. I rewrote the function as an instance method, because for the few pixels one character set should be enough. This eliminates the mysticism of Peter's approach and makes the listing easier for a beginner to get through, at least at this point. The magic of the rest is revealed in the main only after intensive study of the listing and knowledge of the inner life of the class FrameBuffer.
The wireless sensor and its display
For the radio communication we have actually, with the integration of the sensor and the control of the display, two of four jobs already done. The program shtdisplay+.py, or its predecessor shtdisplay.py, must be split into sensor and display unit. The parts must be extended with a UDP client and UDP server, respectively. Furthermore, it has to be decided whether access should be via a local network with WLAN access point, or whether an isolated solution with ESP's own access point is preferred. However, it is not difficult to swap one approach with the other, because only the lines for the radio platform have to be exchanged. Importing the modules network and socket is needed everywhere. For the display unit we need a server loop, which together with the two functions getData() and doJobs() receives and executes jobs. The server loop is also the same for both approaches.
For the WLAN solution of the display part, this area looks like this. The comments tell what is happening.
# Be sure to turn off the AP interface
nac=network.WLAN(network.AP_IF)
nac.active(False)
nac=None
# We create a network interface instance
nic = network.WLAN(network.STA_IF)
nic.active(False)
# Request the MAC address to be entered in the router,
# so that the release of the access can take place
MAC = nic.config('mac')
myID=hexMac(MAC)
print("Client ID",myID)
# We activate the network interface
nic.active(True)
# Establish the connection
# We set a static IP address
nic.ifconfig(("10.0.1.96","255.255.255.0","10.0.1.20","10.0.1.100"))
# Log on to the WLAN router
nic.connect(mySSID, myPass)
if not nic.isconnected():
# wait until the connection to the access point is established
while not nic.isconnected():
print("{}.".format(nic.status()),end='')
d.text("."*n,0,0,1)
d.show()
sleep(1)
# When connected, show connection status & config data
print("\nConnectionStatus: ",connectStatus[nic.status()])
if nic.isconnected():
# Was the configuration successful? Control
STAconf = nic.ifconfig()
print("STA-IP:\t\t",STAconf[0],"\nSTA-NETMASK:\t",\
STAconf[1],"\nSTA-GATEWAY:\t",STAconf[2] ,sep='')
else:
print("No AP found")
d.roll("No AP found",cnt=2)
d.clear()
d.center("stopped")
This part is much shorter for the display unit with its own AP.
# ********************* Set up AP ***********************
# Constructor call creates WiFi object nic
nic = network.WLAN(network.AP_IF)
#
nic.active(True) # Switch on object nic
#
MAC = nic.config('mac') # get binary MAC address and
myMac=hexMac(MAC) # converted to a hex digit sequence
print("AP MAC: \t"+myMac+"\n") # Output
#
ssid = 'choose a name'; passwd = "choose a passwd"
nic.ifconfig(("10.1.1.96","255.255.255.0","10.1.1.96","10.1.1.96"))
print(nic.ifconfig())
#
# MicroPython does not support authentication
nic.config(authmode=0)
print("Authentication mode:",nic.config("authmode"))
# Configure SSID and click on activation of the AP interface
# wait, check status
nic.config(essid=mySSID, password=myPass)
while not nic.active():
print(".",end="")
sleep(1)
print("NIC active:",nic.active())
In both cases, a socket must be set up on which the data exchange is signed out.
 s = socket.socket(socket.AF_INET, socket.SOCK_DGRAM)
 s.setsockopt(socket.SOL_SOCKET,socket.SO_REUSEADDR,1)
 s.bind(('', myPort))
 print("waiting on ",myPort)
 s.settimeout(0.1)
socket.SO_REUSEADDR ensures that the same socket data, IP address and port number can be reused when the program is restarted without a reset. The bind-command binds the IP address assigned during the network connection to the port number in myPort. Agreeing a timeout prevents waiting for incoming requests from blocking the server loop.
The server loop is very manageable and consists mainly of the calls to the function getData() function, which looks to see if messages have arrived, and the call to doJobs() if this was the case.
while 1:
    response=getData()
    if response is not None:
        doJobs(response)

    if button()==0:
        sys.exit()
        #reset()
getData() checks if data has arrived.
def getData():
    try:
        rec,adr=s.recvfrom(150)
        if rec is not None:
            resp=rec.decode()
            cmd,val=resp.split(":",1)
            return cmd,val
    except OSError:
        return None
The method recvfrom() is the receive loop. It is run until a message arrives, or until the set timeout has expired. In the latter case, a timeout exception is thrown, which we can handle with except OSError will catch it. In this case the function throws a None is returned by the function. Exceptions (exception errors) of a different kind, for example a missing colon in the message, will still cause the program to terminate.
If a message is present, then rec contains the data and adr the socket data of the sender. Since we expect texts as data, we convert the bytes sequence to ASCII text. The syntax of the message requires at least one colon separating the command part from the data part. The split content is returned as a tuple in this case.
def doJobs(resp):
    try:
        cmd,val=resp
        cmd=cmd.upper()
        # left-bending
        if cmd == "L":
            d.clear()
            d.text(val,0,0,1)
            d.show()
        # centered
        if cmd == "C":
            d.clear()
            d.center(val)
            d.show()
        # rolls
        if cmd == "R":
            d.clear()
            n=1
            pos=val.find(":")
            if pos != -1:
                n=int(val[:pos])
                val=val[pos+1:]
            print(val,n)
            d.roll(val,cnt=n,delay=30)
            d.clear()
        if cmd == "E":
            d.clear()
    except:
        pass
This tuple gets doJobs() as input. We unpack the tuple cmd,val=resp and convert all alphabetic characters to uppercase. Then we rattle through the command list, which can be expanded at any time.
L stands for left-aligned output, C for centering and R for scrolling. After each input of a command, first the display is cleared, then the text command is executed and finished with show() the display is updated.
The command R can contain a second colon in the data part. This would be preceded by the number of passes. We put n to 1 and look for the second colon.
If none is contained, then pos has the value -1 and the text to be displayed is in val. If a colon is found, then the number of passes precedes the colon and the ":" is followed by the text to the string end of val.
In order not to have to display everything twice, I have added WLANdisplay.py only with the class MATRIX, while APdisplay.py represents the Writer variant. APdisplay.py works with a display consisting of one group of four (32 x 8 pixels), the WLAN variant controls a display with 128 x 8 pixels consisting of 4 groups of four.
After downloading the two files you have to decide which one you prefer for use. If it is about a first test, I suggest the WLAN variant, because for its test you don't necessarily need the SHT21 client in function yet.
Open the file WLANdisplay.py in an editor window of Thonny and start it with F5.

Image 10: WLANdisplay.py is started
Please load the tool Packet transmitter tool. You don't need to install anything if you take the linked portable version. Unpack the ZIP file into any directory and start from the folder PacketSenderPortable start the file packetsender.exe.
First change the local port number of the PC. File - Settings ...

Image 11: Open settings

Image 12: Specify port number
After specifying the destination address and protocol, send the message to the display (red dots).

Image 13: Further specifications
The display should now show 1234 left-justified. Try also once with "C:Hello also!" or "R:3:HEITSE SACHE". If this all works, then it's time for an appreciative pat on the back.
One little thing is still missing, and it comes now.
The SHT21 client
After the separation of responsibilities we can create from the original program shtdisplay.py for the client, which had to do with the control of the display. The query of the HTU21 remains and the already known section for the connection with an access point is added. This is now no longer the one from the router, but our display unit with the IP 10.1.1.96. After the usual suspects, like pin, sleep, esp and so on, we import SHT21, network and socket. The credentials and the address information line up after that. The key at GPIO0 gives us an orderly exit from the main loop in case of emergency. The ESP8266-01 has no keys, so we need the external key module for that.
from sht21 import SHT21
import network
import socket
mySSID = 'display'
myPass = 'guest'
myNetwork=("10.1.1.94","255.255.255.0","10.1.1.96","10.1.1.96")
myPort=9009
target=("10.1.1.96",9009)
taste=Pin(0,Pin.IN,Pin.PULL_UP)
The definition of the bus pins is much slimmer, because the transmitter has no SPI bus anymore.
chip=sys.platform
if chip == 'esp8266':
# pin translator for ESP8266 boards
# LUA pins D0 D1 D2 D3 D4 D5 D6 D7 D8
# ESP8266 pins 16 5 4 0 2 14 12 13 15
# SC SD
# SCL=Pin(5) # normal 8266
# SDA=Pin(4)
SCL=Pin(0) # ESP8266-S01
SDA=Pin(2)
elif chip == 'esp32':
SCL=Pin(21)
SDA=Pin(22)
else:
raise OSError ("Unknown port")
print("SCL: {}, SDA: {}".format(SCL,SDA))
i2c=SoftI2C(SCL,SDA)
sht=SHT21(i2c)
temperature=True # temp/hum switch
delay=3000 # ms
Then we instantiate an I2C object and pass it to the SHT21 object sht. The flag temperature triggers the sending of the temperature string to the display unit in the main loop and delay contains the interval duration for updating the measured values.
getTemp() and getHum() fetch the measured values from the HTU21 in a familiar way, but this time separately, and also prepare the strings for transfer to the display unit. I use format strings for this, as in several other places in the programs. I will briefly describe the mysticism behind this and demystify a part of it.
The actual format statement is contained in the pair of braces {}. Any printable characters can be placed around them. The whole thing is enclosed in a pair of quotation marks, " " or ' '. The method format() from the class str takes the object from the parameter list and inserts it into the format string for the output.
>>> "Temp {}".format(23.5)
'Temp 23.5'
>>> "Temp {}: {} C".format("inside",25.7)
'Temp inside: 25.7 C'
Chaining is possible. The order of the arguments determines the order for filling the placeholders in the format string (automatic field numbering). The order can be changed manually (manual field specification).
>>> "Temp {1} C, {0} ".format("inside",25.7)
'Temp 25.7 C, inside '
The use of names and variables is possible.
>>> temp=23.8
>>> hum=45.3
>>> "Measured values: {t} C, {h} %".format(h=hum,t=temp)
'Measured values: 23.8 C, 45.3 %'
On colon separates the numbering or names from other format specifications. Names and numbering can be mixed.
>>> temp=23.8762
>>> "Measured values: {t:6.1f} C, {0:.3f} %".format(45.2,t=temp)
'Measured values: 23.9 C, 45.200 %'
The temperature is set here to a minimum width of 6 digits by filling with leading blanks (default). The floating point number (f) is reduced to one decimal place (.1). The number 45.2 is at the 0-th position in the parameter list and is aligned flush with the preceding text without specifying a minimum width. The 3 decimal places are filled with zeros if not enough.
For the output of a value in other number systems than decimal, corresponding symbols are available, example binary system.
Output as Binary number
>>> "{:b}".format(57)
'111001'
Output with leading spaces with minimum width of 8 characters.
>>> "{:8b}".format(57)
'  111001'
The output with leading zeros is ideal for checking register contents during the development phase.
>>> "{:08b}".format(57)
'00111001'
>>> w=0xA2C
>>> w
2604
>>> "{:#06X}".format(w)
'0X0A2C'
The hash (#) leads to the identification as hexadecimal value at the output (0X...). The minimum width of 6 leaves 4 digits for the digit sequence 0A2C, missing digits are filled with zeros (06). The X makes the hexadecimal digits A through F appear as uppercase letters.
I think that's enough for now, although I've only scratched the surface. Back to the SHT client. The method doJobs() gets the measured value string from getTemp() or getHum(). The command to center is prefixed and the whole thing is sent to the address in target as a prefix.
The function TimeOut() is my non-blocking timer. It is a so-called closure, a function that defines another function inside it and returns a reference to that function instead of a numeric value. Normally, all variable contents declared and used inside a function are stepped in when the function exits. In the case of a closure, all variable references that were declared and used outside the enclosed function remain in the function. compare() were defined and referenced (called) inside, after leaving the outer function TimeOut() is preserved. This allows to periodically query the function value of compare(), which gives us True lets us know the timer has expired. You can learn more about Closures in the PDF document Closures and Decorators.pdf.
def TimeOut(t):
    start=ticks_ms()
    def compare():
        return int(ticks_ms()-start) >= t
    return compare
The Dictionary connectStatus returns the following in connection with the call of the method nic.status() method returns the plain text for its return value.
connectStatus = {
    0: "STAT_IDLE",
    1: "STAT_CONNECTING",
    2:  "STAT_WRONG_PASSWORD",
    3:  "NO AP FOUND",
    4:  "STAT_CONNECT_FAIL",
    5:    "GOT_IP"
    1000: "STAT_IDLE",
    1001: "STAT_CONNECTING",
    1010: "STAT_GOT_IP",
    202:  "STAT_WRONG_PASSWORD",
    201:  "NO AP FOUND",
    }
Especially with the ESP8266 it is important to switch off the AP interface (access point interface) when it is not needed.
# It is essential to switch off the AP interface
nac=network.WLAN(network.AP_IF)
nac.active(False)
nac=None
As a client we need the STA interface (station interface), which we also activate immediately.
# We create a network interface instance
nic = network.WLAN(network.STA_IF)
nic.active(False)
# We activate the network interface
nic.active(True)
We configure the interface with the network data specified above.
myNetwork=("10.1.1.94","255.255.255.0","10.1.1.96","10.1.1.96")
The round brackets are necessary, because the four strings represent a tuple. All four details, the own IP address, the network mask, the gateway IP and the IP of the DNS server, are required. In our standalone solution, there is no gateway and no DNS, and there is no Internet access. Omitting the addresses would lead to an error and program termination, so I enter the IP of the display access point for both.
# Establishing the connection
# We set a static IP address
nic.ifconfig(myNetwork)
For the login to the display unit access point we pass the credentials. The use of a password is not supported, but omitting the parameter myPass parameter still leads to an error message.
# Logging on to the WLAN router
nic.connect(mySSID, myPass)
Normally there is no connection at this point, nic.isconnected() returns False and with the not in front of it, it therefore goes into the waiting loop until the connection is established. Until then, a "." is output every second. The end="" prevents a line break.
if not nic.isconnected():
    # wait until the connection to the access point is established
    while not nic.isconnected():
        print("{}.".format(nic.status()),end='')
        sleep(1)
We display the connection status in plain text as well as the address data.
# If connected, show connection status & config data
print("\nConnectionStatus: ",connectStatus[nic.status()])
if nic.isconnected():
    # Was the configuration successful? Control
    STAconf = nic.ifconfig()
    print("STA-IP:\t\t",STAconf[0],"\nSTA-NETMASK:\t",\
          STAconf[1],"\nSTA-GATEWAY:\t",STAconf[2] ,sep='')
else:
    print("No AP found")
Then we build the UDP interface as described above.
s = socket.socket(socket.AF_INET, socket.SOCK_DGRAM)
s.setsockopt(socket.SOL_SOCKET,socket.SO_REUSEADDR,1)
s.bind(('', myPort))
print("sending on port",myPort)
s.settimeout(0.1)
The main loop closes the program. Before the entry we start the timer interval( ) with the time specified in delay defined in milliseconds. The function (!!!) interval(), whose identifier is a reference to the function compare() in TimeOut(), returns the value until the 3000 ms have elapsed. False, after that True back.
interval=TimeOut(delay)
while 1:
    if interval():
        if temperature:
            data=getTemp()
            temperature=False
        else:
            data=getHum()
            temperature=True
        interval=TimeOut(delay)
        if data is not None:
            doJobs(data)
    if key()==0:
        sys.exit()
        #reset()
In the loop we check for the return value. If false, nothing happens. Only the key is queried, the pressing of which leads to the end of the program, alternatively to a restart.
If the timer has expired interval() True back. Then we check if the temperature-flag is set. In this case the temperature string must be written to the variable data variable. The flag is set to False the next time, the relative humidity in the else-branch. There the flag is set again to True which closes the circle.
In any case, the timer must be restarted. If the content of the variable data is valid, the doJobs() sends the job to the display.
As with the display unit, it is necessary to display the entire program sht21client.py as boot.py into the flash of the ESP8266-01, so that an autonomous operation without PC can take place. One possibility of implementation is the, sht21client.py via File - Save as... under the name boot.py to save it again. Then upload boot.py to the ESP8266 as usual.

Image 14: Save under new name
If the display unit is still running now, the data from the client should appear there in the display. I hope you don't have to uchen, but can sit back and admire your work with a nice cup of coffee. If you are not sure about the meaning of the word uchen, try the prefix "s" or "fl".
Outlook
In the next episode, we will discuss the online service Open Weather Map (OWM) to program a weather ticker using this data and our matrix display. OWM provides free accounts. After signing up, you get a user key with which you can query various weather data. Curious now?
Well, see you soon!


1 commento
Philipp
Danke für die Tollen Beiträge !