
So far you have in the two previous blog parts (Part 1, Part 2) learned how to install Openhab on a Raspberrypi or PC and create a virtual environment of your apartment or house. For these rooms I showed how they install bindings, i.e. extensions, in Openhab and also query and save the first sensor data. The sensors were linked to rooms or objects in the house.
In this blog post, we focus on using the data to automatically control the lighting of an aquarium in the demohaus. A rule is used here that performs a so-called blockly script.
Required hardware and software
For this part you need a finished installation of Openhab. In addition, this article uses a socket flashed with Tasmota, which communicates with a MQTT broker. For this, the MQTT broker should go out Blog post 2 Installed, furnished and furnished as a binding in Openhab. You will install and set up the binding for Astro in this post.
Before it begins
It must be said in advance that the adding one Thing, i.e. as a component that is to be controlled later, differentiates from manufacturer to manufacturer. Many devices can be MQTT, but here too the way the device receives and sends the device differentiates. Therefore, attention must be paid to the documentation of the manufacturer of the device, or a good MQTT-viewer should be used. In this example, a nous device with Tasmota firmware is used.
In this blog I use the Blockly scripteditor. This is very powerful, but keeps many functions quite simple. A complete overview of the commands and functions cannot be given in this article, which would simply go beyond the frame. There are various (video) tutorials on the Internet that explain parts of Blockly very well.
Install / set up astrobinding
In the first post I recommended this series to install the Binding Astro. If this has not been done yet, you should install this afterwards. Go through settings -> Bindings, see Figure 1.

Figure 1: Install binding
There you search for Astro at the bottom right and install it immediately afterwards, see Figure 2.

Figure 2: Install the Astro Binding
If the binding is installed, switch to Settings -> Things And after you have pressed the "+" in the lower right corner, choose the point astro binding, see Figure 3.

Figure 3: Select Astro Binding
In the following dialog, select the entry Local sun data and confirm with OK, see Figure 4.

Figure 4: Add local sun data
Install binding actions
Important actions still have to be installed in the same train so that the blockly programming will work later.
Search once for:
- MQTT Action
- Astro action
If you have found them through the search, install them. More about these modules is explained when programming via blockly.
Prepare the MQTT socket
Next, create the thing for the socket, which will later control the light of the aquarium. In the Things area, add a new thing and choose via the "+" on the right bottom of MQTT BINDING, see Figure 5.

Figure 5: Add MQTT Binding
In the following dialog, select Generic Mqtt Thing And give a location, a label and indicate the parent bridge. Then create the MQTT thing, see Figure 6.

Figure 6: Create MQTT Thing
Up to this point, the process does not differ from the last post in which a sensor was created as a MQTT-Tating. Now, as in the previous post, they put a channel over Channel -> Add Chanel in the corresponding MQTT thing. Give a name and label for the thing. It is important at the point that as a channel type On/off Switch is chosen, see Figure 7.

Figure 7: Definition of the Channel
Now comes the tricky part, which differs from manufacturer to manufacturer, the configuration of the topics. There are two topics here because there is a command topic and a status topic, see Figure 8.

Figure 8: Set the topics correctly
At MQTT State the current status of the devices is reproduced with MQTT Command Give a new value. You can use the last two fields to set a different status word to switch the device on and off. As a rule, you don't have to enter anything here. Then press on Creator And the channel should be created.
Finally, the socket in our model should now appear and correctly be assigned to an aquarium in the living room. To do this, switch to the model and fold everything up until you have arrived at the living room. Select the living room and press Create Equipment from ThinG, see Figure 9.

Figure 9: Add equipment to the model
In the new dialog, press Thing and select the previously generated MQTT device, see Figure 10. Important at the point that you should give clear names so that you can find the device quickly and easily later.

Figure 10: Assign a thing to the equipment
Then hand over the right category of the equipment and select the correct one below Category, type and Semantic Class of the Things, see Figure 11.

Figure 11: final configuration
If everything worked so far, the equipment and another item should appear in the model. It is interesting that you have a switch in the surface with which you can directly switch on or off the socket for the light, see Figure 12.

Figure 12: Equipment and item in the model
It is advisable to try this switch at the point so that later when creating the script can be excluded that the commands and states were not set incorrectly in MQTT.
Rules, scripts and blockly
Up to now, our control has no automation. Data can be received via MQTT and a socket is connected to MQTT, which can be switched on or switched off on command. In our current example, this does not help to automatically switch on and off a lamp of an aquarium. This is made possible by automatism with defined rules that you have in the area Rules can create, see Figure 13.
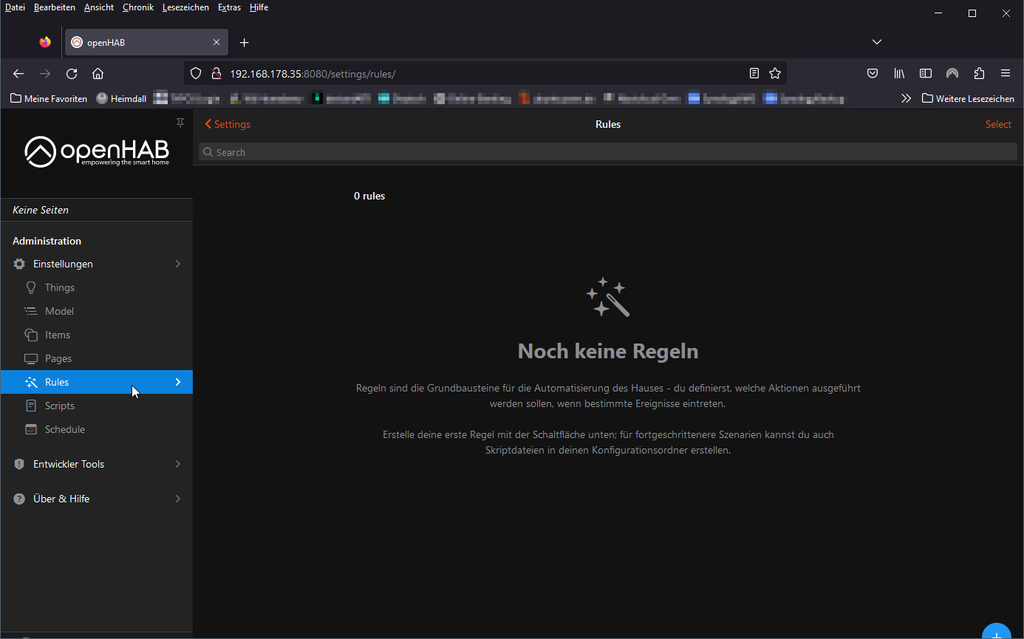
Figure 13: The Rules area for automation
Interesting I find the text that describes this area super: "Rules are the basic building blocks for the automation of the house - you define which actions should be carried out when certain events occur." Say it is exactly what the aquarium needs in this example. You create a new rule via the "+" below right. As always, you should start, first with a meaningful name and a short description, see Figure 14.

Figure 14: Basic information on the rule
Below is now being set what exactly should happen when.
- When - when should something happen
- Then - what should happen if when
- But only if - special condition, which must be fulfilled in addition to when
All three views look almost identical, see Figure 15, in which you can choose between an item, trigger, time or system event.

Figure 15: Dialogue by When
In the dialogue of then the word becomes the word Event through action and with but only if through Condition replaced. It's great that the dialogues look identical and you can find your way quickly.
Now we come back to the example with the lamp in the aquarium. I just want to keep it at this point so that the entry is easy. The aquarium's lamp should go on when the time of sunrise in my region has been reached and the lamp should also go out when the time of the sunset in my region is reached. I deliberately hide some special cases at this point. However, I would like to incorporate some security so that when the MQTT device has been plugged in and reinstated, the lamp is still switched correctly again. It would be an offer that the condition for sunrise and sunset is checked cyclically every 30 seconds and the lamp is switched on or off accordingly. Unnecessary commands should be avoided, so more.
With this consideration, the When dialogue is now going. Since I want an exam every 30 seconds, a time event is needed. Select this in the dialog, whereupon the next question comes up with what type of event it should be, see Figure 16.

Figure 16: Question about which time event it is about
To choose from the type of time event it should be:
- After a schedule, also called cron job at Linux
- At a fixed time a day
- or in a defined period of an item
In our case, we would like to make a schedule in the type of cron job and leave the selection like this. Next, choose below Build, to correctly enter the cron time plan. This is a kind of wizard that creates a correct cron time plan with her information. I explain the riders from right to left because it is easier for this example. The schedule should be executed every month, every day, every hour and every hour, every 30 seconds starting the second 0, see Figure 17.

Figure 17: The cron schedule for every 30 seconds from second 0 0
Accordingly, the cron time plan should 0/30 * * * * ? * to be generated. The first part is done and can be done via the button Done to be taken over.
Next you have to under That Create a new campaign in this case a script with the blockly editor, see Figure 18.

Figure 18: Add script
In the newly opened editor you now have to implement the timer for our aquarium. Since it would take a little longer to explain the complete editor, I give you a brief overview of my solution. This is not perfect and some improvements are still required, but the aquarium is switched on at sunrise and switched off at sunset, see Figure 19.

Figure 19: Finished blockly script
In principle, it is very easy to build this script yourself. On the left side, it finds the corresponding building blocks that they line together bit by bit. To expand the logic module for the IF statement, for example, press the blue gear.
The colors of the individual blockly modules represent the individual types of group modules. Only to check the sunrise and sunset and do you have to under Libraries -> Astro Select the component.
In principle, it doesn't take long for you to "write" this simple script. Save it over Save in the upper right corner. After that, the script should be executed every 30 seconds. But you can also test on the lower left corner run Press to check whether the script also works.
If the code works, it will go through every 30 seconds after the set rule.
Summary
You have learned to automate tasks via a script. In the current example of this blog, an aquarium lamp was controlled, but this example should only show how easy it is to automate tasks. Regardless of whether it is a simple lamp, or you want to develop a complete house control. Everything is possible with Openhab as long as you can imagine it. Now it is up to you to implement your home automation.
Further projects for AZ-Delivery You can find from me https://github.com/M3taKn1ght/Blog-Repo.


