This post is also available as PDF document.
At the Post on If-This-Then-That We had sent data from ESP32 or ESP8266 to IFTTT, which the server then sent us as an email. Then we had them Represent measurement data from BME280 and BH1750 through Thingspeak graphically let. In this episode our ESP32 contact with a bot Telegram to record. No ESP8266? No, unfortunately not. Why? Because the program and the modules are quite cute, I first tried it with an ESP8266 D1 Mini. Everything went perfectly until the little one should put a post request to the Telegram bot. I permanently got the Oserror -40, no matter what I tried. I didn't find what I was looking for on the web. After a unsuccessful morning, I converted the circuit for an ESP32. See there - the same program, the same modules and the same assemblies - all purred like clockwork. Something in the kernel of the ESP8266 must tick differently than with the ESP32, he ticks properly.
In connection with the Telegram bot, we will deal a little with JSON code (JSON = Java Script Object notification). There are strong similarities with micropython objects. The Micropython module also offers Telegram_EXT Two interesting features to expand a class at runtime with application -specific functions without having to intervene in the program text of the class. Sounds interesting? Well then we'll start with a new episode from the line
Micropython on the ESP32 and ESP8266
today
Telegram and the ESP32
With Telegram we get the opportunity not only to receive messages on the PC or cell phone, but also to control our ESP32 interactively. This means that we switch on an LED, call values from the DHT22 and have event -controlled sensor data sent us without starting an inquiry. So if you do not have your own web server, this post is the key to global access to your ESP32 unit.
Hardware
In order to be able to view the condition of the circuit at any time on site, I donated a display to the ESP. An orderly demolition of the program is possible via a button, for example, actuators have to be switched off safely, such as the LED.
|
1 |
ESP32 Dev Kit C V4 unplacerated or |
|
1 |
|
|
1 |
Ky-021 Magnet switch mini magnet reed module sensor or 10x n/o Reed switch magnetic switch 2 * 14mm magnetic induction switch for arduino + 1 resistance 10kΩ |
|
1 |
|
|
1 |
|
|
1 |
LED, for example red |
|
1 |
Resistance 330 Ω |
|
1 |
Resistance 10 kΩ |
|
2 |
|
|
various |
Jumper Wire cable 3 x 40 pcs. 20 cm M2M / F2M / F2F each possibly too |
|
optional |
So that slots for the cables are still free next to the controller, I have put two Breadboards together with a power rail in between.

Figure 1: Two Breadboards for the ESP32
Reed contact requires a special mention. It should deliver on contact S 3.3V if the contact is closed. Therefore, we have to assign the connections to the platinum "+" and "-" as in Figure 2 on the right. If you have chosen the loose form of the component, it is just more unobtrusive to attach, then you have to install an extra 10kΩ resistance, one is already available on the module.

Figure 2: So we switched the REED contact
Reed contact is made to switch through the approach of a magnet. His springs stripes are ferromagnetic. In a magnetic field, the stripes themselves become magnetic and mutually attract each other, which makes the contact closed. If you remove the magnetic field, the feather forces drive the strips back into their starting position, which opens contact.

Figure 3: This is how a reed contact works
An important tip!: Be very careful if you want to bend the connection wires. You are very rigid. If you bend them too close to the vitreous, it breaks out and the component is in the eternal hunting grounds.

Figure 4: Reed contact
Here is the circuit for the project:

Figure 5: circuit with a reed module
The software
For flashing and the programming of the ESP32:
Thonny or
Used firmware for the ESP32:
Used firmware for the ESP8266:
The micropython programs for the project:
SSD1306.PY Hardware driver for the OLED display
oled.py API for the OLED display
telegram_ext.py API for Telegram traffic
telegram.py Operating software of the project
timeout.py Software
Micropython - Language - Modules and Programs
To install Thonny you will find one here Detailed instructions (English version). There is also a description of how that Micropython firmware (As of 18.06.2022) on the ESP chip burned becomes.
Micropython is an interpreter language. The main difference to the Arduino IDE, where you always flash entire programs, is that you only have to flash the Micropython firmware once on the ESP32 so that the controller understands micropython instructions. You can use Thonny, µpycraft or ESPTOOL.PY. For Thonny I have the process here described.
As soon as the firmware has flashed, you can easily talk to your controller in a dialogue, test individual commands and see the answer immediately without having to compile and transmit an entire program beforehand. That is exactly what bothers me on the Arduino IDE. You simply save an enormous time if you can check simple tests of the syntax and hardware to trying out and refining functions and entire program parts via the command line before knitting a program from it. For this purpose, I always like to create small test programs. As a kind of macro, they summarize recurring commands. Whole applications then develop from such program fragments.
Autostart
If the program is to start autonomously by switching on the controller, copy the program text into a newly created blank tile. Save this file under boot.py in WorkSpace and upload it to the ESP chip. The program starts automatically the next time the reset or switching on.
Test programs
Programs from the current editor window in the Thonny-IDE are started manually via the F5 button. This can be done faster than the mouse click on the start button, or via the menu run. Only the modules used in the program must be in the flash of the ESP32.
In between, Arduino id again?
Should you later use the controller together with the Arduino IDE, just flash the program in the usual way. However, the ESP32/ESP8266 then forgot that it has ever spoken Micropython. Conversely, any espressif chip that contains a compiled program from the Arduino IDE or AT-Firmware or Lua or ... can be easily provided with the micropython firmware. The process is always like here described.
Telegram - Apps and Bot Bot
Generate a telegram account
- It is best to create the Telegram account with your cell phone or tablet. To do this, load and install the app from the Playstore.
- Start the app and grope Start now.
- Give Telegram authorization to call you.
- Enter your phone number and grop Further.
- Allow Telegram to access your telephone contact list.
- Enter the first and last name and grop the blue arrow.
- Restart the app.
Telegram software for the PC
There is software for the PC to contact Telegram. So you can download and install them. Follow that link. He leads you to this page.

Figure 6: Download Telegram app for the desktop PC
I have the Portable version chosen, you can also unzip it on a stick. Save the ZIP archive in any directory and unzip it there.

Figure 7: Unzip portable version
You can find the file in the Telegram folder Telegram.exe. Create a link from this.

Figure 8: Create a link from the application
You pull the link to the desktop.

Figure 9: Link to the app on the desktop
At the start, Windows brings a security warning, click on Carry out.
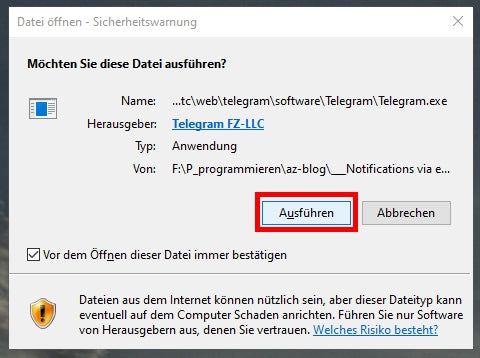
Figure 10: After the start
We build a bot
In the search field at the top left of the start window we give Botfather one and click on the first list entry.

Figure 11: Search Botfather

Figure 12: Botfather
Click on /Newbot it continues.

Figure 13: Create new bot
We enter the name for the new bot in the input line and send the message with the small blue triangle to Botfather at the bottom right.

Figure 14: Name Bot
The username for the bot can be chosen as desired, but must end on bot.
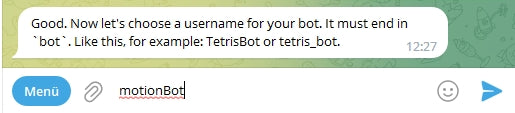
Figure 15: Define username for the bot
After sending the message, you will receive the token for API access. Copy the string and place it in a safe position, we need it later.

Figure 16: New bot is created
You also need the bot ID for access. You get them about the IDBot, which we advertise for the search.

Figure 17: Search Idbot
Click on the list entry and then start.

Figure 18: Start Idbot

Figure 19: User ID in response
You also need the ID later.
You can now contact the ESP32 via the new Bot if the application for your project is running. To ensure that this runs, we are now talking through the program.

Figure 20: Switching and calling up values
The chat program
I have the module for the program utelegram.py used that I on Github have found. For my purposes I added two extensions and the method list() bubbled up.
    def set callback (self, F):
        self.CB = F
def setexite(self,F):
self.finish = F
def list(self):
while True:
self.read_once()
            IF self.CB is need None:
                self.CB()
            IF self.finish is need None:
                self.finish()
time.sleep(self.Sleep_Btw_updates)
GC.collect()
In Python you can pass on the reference to a function. This is used Blossoms. But here too you can do a great thing with it.
Usually the main loop runs in the main program, where you can design them according to personal needs. But our main loop is the method list() in the module utelegram.py. Of course, we could implement our wishes by changing the code of the module. However, we would have to do that again every time we want to use the module for another purpose.
There is an easier way to do the behavior of the class utelegram.ubot to change without changing the class code. The class can do this in two forms that both have the same background, callback functions. Let's take a look at the simpler, static version.
def set callback (self, F):
self.CB = F
I define a method here set callback(), which takes the reference to a function of the main program as an argument and the attribute CB assigned. I put it with it CB To be able to be called up as a function and to perform the code of the referenced function in the main program. Because CB within ubot is declared, I can use the function everywhere in the class. I do that in the list-Ribbon.
IF self.CB is need None:
self.CB()
IF self.finish is need None:
self.finish()
White at the start of the program list() but not yet what should be carried out. Therefore I prove in the constructor CB and finish with None before. In list() Nothing happens as long as this assignment is active.
        self.CB = None
        self.finish=None
In the main program, I finally hand over the names of the functions declared in the main program.
    bot.set callback(Warndoortemp)
    boron.setexite(cancel program)
If I want to have other functions executed, or if changes to the code of the two functions are necessary, I just give the new names or change the code. But I don't have to ubot Upload again, but only restart the main program. And I can use Ubot without change for new projects.
The dictionaries uses the dynamic method of using callback functions. The name of an action is saved as the key and the name of a function in the main program is saved. This enables us to get command code that we have sent to the ESP32 by Telegram in the reception method read_once() Parsen and the appropriate routine in the main program. That makes the method Message_handler(). If we need a new command, we simply attach the name and the function to be carried out to the dictionary. Awesome, right?
    bot.register('/Values', Sendvalues)
    bot.register('/on',switch)
    bot.register('/Off',Switchoff)
    bot.set_default_handler(get_message)
Through this procedure we can utelegram.py even compile now, because we don't have to change anything anymore. This saves space in the flash and protects our code.
The micropython program for the bot
Only three modules in the import list are external files: timeout.py, telegram_ext.py and oled.py. The latter module imported SSD1306.PY. These four files must therefore be uploaded to the ESP32.
From time-out import *
From time import sleep
From machine import Pin code, Softi2c
From OLED import OLED
import dht
import network
import Telegram_EXT
import sys
For SSID, password, token and PID, please use your data.
myssid = 'Empire_of_ants'; mypass = "Nightingale"
token = 'Here goes your token'
Pid = "Here goes your id"
The following block automatically determines the correct connections for the I2C bus depending on the controller type and creates an I2C object.
IF sys.platform == "ESP8266":
    I2C=Softi2c(scl=Pin code(5),sda=Pin code(4))
elif sys.platform == "ESP32":
    I2C=Softi2c(scl=Pin code(22),sda=Pin code(21))
Else:
    raise Runtime("Unknown Port")
We hand over the bus object to the constructor of the OLED class, set the brightness and issue the heading.
D=OLED(I2C,Heightw=64) # 128x64 pixel display
D.contrast(255)
D.writer("Ambient Data",2,0)
Then we instance the DHT22 object, entrances for reed contact, the button and an output for the LED. So that warnings for the temperature exceeding or open door are not continuously occurring, we define a break of 10 seconds. We put the associated software timer 1 second so that the surveillance starts immediately.
amb=dht.DHT22(Pin code(14)) # D5
reed=Pin code(15,Pin code.IN)  # D3
LED=Pin code(13,Pin code.OUT,value=0) # D7
button=Pin code(17,Pin code.IN, Pin code. Pull_up)
deadtime=10 # Seconds dead between warnings
sendnow=Time-out(1)
The dictionary connect status Translated the number codes we from nic.status() received, in plain text.
connect status = {
    1000: "Stat_idle",
    1001: "Stat_Connecting",
    1010: "Stat_got_ip",
    202:  "Stat_wrong_Password",
    201:  "No ap found",
    5:    "Unknown",
    0: "Stat_idle",
    1: "Stat_Connecting",
    5: "Stat_got_ip",
    2:  "Stat_wrong_Password",
    3:  "No ap found",
    4:  "Stat_Connect_Fail",
    }
From the function hexmac() we learn the MAC address of the station interface. The WLAN router must know this address so that it grants access to the ESP32.
def hexmac(bytemac):
  """
  The HexMac function takes the MAC address in the bytecode
  opposite and forms a string for the rehabilitation
  """
  MacString =""
  for I in range(0,len(bytemac)):     # For all byte values
    MacString += hex(bytemac[I])[2:]  # from position 2 to the end
    IF I <len(bytemac)-1 :            # Delimiter
      MacString +="-"
  return MacString
Now the declarations of the callback routines come. They are from the methods list() and Message_handler() from the class ubot Called (Indirect Call).
get_message() by Ubot.set_default_handler() called when Telegram receives a message that does not meet any specific identifier and therefore cannot be assigned to any special action. In message the received news block is handed over to JSON NOSTION. The two print instructions are used for the presentation during the development period and can be deleted or commented in production. The text message is from the message-Block filtered out and sent to the PC and cell phone in capital letters.
def get_message(message):
    print("Message: \ n",message,"\ n")
    print("Message: \ n",message['Message']['text'])
    bot.send(message['Message']['Chat']['ID'],
             message['Message']['text'].upper())
The syntax of the method send() is basically very simple, but it works through the structure of the message-Blocks mighty complicated.
bot.send(Telegram-ID, Text message)
To get light into the dark, we take a closer look at such a block. The JavaScript Object notation, Json for short, is strongly reminiscent of the Micropython objects List, Dictionary and String.
JSON element types
- [] marks an array (list in Micropython)
- {} marks an object (a dictionary in Micropython)
- "" or '' limits a string (a string constant in Micropython)
- Numbers contain the digits 0 to 9, "-"-sign and decimal point "."
- true and false Are Bool's values (in Micropython True and False)
- zero Is the zero value (in Micropython None)
The elements of arrays and objects are separated by commas. The comma and the colon in the name value pairs of objects follow a spaces.
The Ubot method. read_once() Reads existing news blocks into an array and hands over the last entry to Ubot.Message_handler().
messages = self.READ_MESSAGES()
…
self.Message_handler(messages[-1])
Let's take a look now messages and one message-Block closer.

Figure 21: A message object
You think that is no less confusing? They are exactly right there. I took the trouble to put the whole thing into a structured shape. Now everything is very simple. The array messages Contains one messagethat with the name-value couple 'Update_ID': 'XXXXXXXXXX' begins. The value of the second couple with the name message Is an object contains the objects, simple name value pairs and an array.

Figure 22: Hierarchical structure of messages in JSON format
Then Message ['Message'] ['Chat'] ['id'] '1234567890' and
Message ['Message'] ['Text'] Is 'Message from ESP32'. The ID could also have been called up like this: Message ['Message'] ['from'] ['id']. Now you are sure that it is easy to get information from the block.
When we offered our command /on Send the function via the Telegram app, the function switch() executed. We have the value of message ['Message'] ['Text'] walk into capitalized letters, output in the terminal and, after we have switched on the LED, return.
def switch(message):
    print(message['Message']['text'])
    code=message['Message']['text'].upper()
    print(code)
    LED.on()
    bot.send(message['Message']['Chat']['ID'], code)
The function behaves analogously Switchoff().
def Switchoff(message):
    print(message['Message']['text'])
    code=message['Message']['text'].upper()
    print(code)
    LED.off()
    bot.send(message['Message']['Chat']['ID'], code)
cancel program() is from ubot.lists() called up to test whether the demolition button is pressed and then to end the program if necessary. list() Even the button cannot query because the method of the presence of the keyboard object does not have the most pale shimmer. But list() knows that a function bot. end() must be called up cyclically and bot. end knows the house number of cancel program() and therefore knows where to be knocked. cancel program() in turn knows the object button very good and can therefore query the condition. Do you know the story "The farmer sends out the jockel ..."?

Figure 23: Callback process
The function Warndoortemp() is a trace again. Why is the function sendnow designated as global and button.value in cancel program() not? Quite simply because we would get an error message when we sendnow do not declare as globally:
Traceback (custody recent call load):
File "" , line 174, in <modules>
File "Telegram_ext.py", line 69, in list
File "" , line 97, in Warndoortemp
Name: local variable refer ceremony assignment
def Warndoortemp():
    global sendnow
    amb.measure()
    tempo=amb.temperature()
    message=""
    IF sendnow():
        IF reed.value()==0:
            message="Door Open!"
        IF tempo > 20:
            message+="Temperature too high: {: .2f} ° C".\
                     format(tempo)
        IF message != "":
            bot.send(Pid,message)
        sendnow=Time-out(deadtime)
button.value() is only referenced, but not declared in the function. In line 6 we call sendnow() on, but in the last line we declare sendnow() by calling Time-out() new. The micropython interpreter staggered with it sendnow as a local variable and recognizes that this is referenced before you have the reference to the Closure compare() is assigned in Time-out() is declared. Because we sendnow As a global object, we make the query possible before we assign a new value. Access is now to the global reference of sendnow. The interpreter is no longer encountered by the subsequent value assignment.
def Time-out(T):
    begin=time()

    def compare():
        nonlocal begin
        IF T==0:
            return False
        Else:
            return intimately(time()-begin) >= T

    return compare
In Warndoortemp() we get the temperature value and prepare the result string. If the timer has expired, we check the condition of the reed contact and the value of the temperature. Only when one of the two events has been triggered will a message be sent to our Telegram account. Then we reorganize the alarm clock.
def Sendvalues(message):
    print(message['Message']['text'])
    code=message['Message']['text'].upper()
    print(code)
    amb.measure()
    tempo=amb.temperature()
    humble=amb.humidity()
    D.clearft(0,1,15,2,False)
    D.writer("Temp: {: .2f}".format(tempo),0,1,False)
    D.writer("Rhum: {: .2f}".format(humble),0,2,False)
    code="Temperature: {: .2f} *C \ n".format(tempo)
    code+="Rel. Moisture: {: .2f}%\ n".format(humble)
    bot.send(message['Message']['Chat']['ID'], code)
Sendvalues() is called when we /Values Send to the bot. Order the measurement, call up the temperature and relative air humidity and output it on the display. In code the message is put together and finally sent.
Now we connect to the WLAN router.
nic=network.WIRELESS INTERNET ACCESS(network.Ap_if)
nic.active(False)
nic = network.WIRELESS INTERNET ACCESS(network.Sta_if) # creates WiFi object Nic
nic.active(True) # Nic turn on
sleep(1)
Mac = nic.config('Mac') # Call base Mac address and
mymac=hexmac(Mac) # converted into a hex digit sequence
print("Mac station: \ t"+mymac+"\ n") # spend
IF need nic.Isconnected():
nic.connect(myssid, mypass)
print("Status:", nic.Isconnected())
D.writer("WLAN Connecting",0,1)
point="............"
n=1
while nic.status() != network.Stat_got_ip:
print(".",end='')
D.writer(point[0:n],0,2)
n+=1
sleep(1)
print("\ nstatus:",connect status[nic.status()])
D.clearall()
Staconf = nic.ifconfig()
print("Sta-IP: \ t \ t",Staconf[0],"\ nsta-netmask: \ t",Staconf[1],\
"\ nsta-gateway: \ t",Staconf[2] ,sep='')
D.writer(Staconf[0],0,0)
D.writer(Staconf[1],0,1)
D.writer(Staconf[2],0,2)
sleep(3)
D.clearall()
D.writer("Ambient Data",2,0)
The only lack of instantiation of the bot and registration of the callback functions if a connection to the router has come about. register() builds the dictionary ubot.command on. set_default_handler(),
set callback() and setexite() make the corresponding functions known in Ubot. Final becomes bot.list() Enter the reception loop.
IF nic.Isconnected():
    bot = Telegram_EXT.ubot(token)
    bot.register('/Values', Sendvalues)
    bot.register('/on',switch)
    bot.register('/Off',Switchoff)
    bot.set_default_handler(get_message)
    bot.set callback(Warndoortemp)
    bot.setexite(cancel program)
    print('Bot Listening')
    bot.list()
Else:
    print('Not Connected - Aborting')
The program ends if there is no connection to the router.
Wrapping up
Here again all the steps to get the project up and running.
- Build circuit
- Load and install Telegram app on the cell phone
- Set up Telegram account via the cell phone
- Download the Telegram app for the desktop PC and unzip
- Call up the botfather and set up one bot
- Download the service programs and upload to the ESP32
- SSD1306.PY
- oled.py
- telegram_ext.py
- timeout.py
- Start Telegram app (PC and or cell phone)
- Pay a magnet on the reed contact
- The program telegram.py Start in the editor
- Enter and send one of the commands in the input time of the Telegram app and send it
- Check the reactions of the ESP32 (LED)
- Remove the magnet, does the message come from the bot?
- Does the message come when the temperature exceeds the limit?
- If everything works, the program telegram.py as main.py Save in the flash of the ESP32.
- Restart the ESP32
So far, all good things have been three, in the next episode on messaging we will deal with the service Whatsapp.
Until then, stay tuned!


5 comments
Jürgen
@ Karl Meyer
Nein, es liegt nicht an der neusten MicroPythonversion, sondern daran, dass ich vergaß die Zeilen 13 und 14 aus Downloadlisting herauszunehmen. Die wiedergabe der Teile des Listings bei der Besprechung im Blog-Post ist korrekt. Die Confidentials werden in den Zeilen 24, 25 und 26 in der dargestellten Form direkt ins Listing geschrieben. Die Angaben dort sind Dummies und müssen natürlich durch Ihre eigenen Zugangsdaten ersetzt werden. Sie können auch die korrigierte Version der Datei downloaden.
Karl Meyer
@Jürgen Grzesina
Interessantes Projekt, Bekomme aber eine Fehlermeldung dass die Datei "config nicht vorhanden ist. kann das an meiner Micropython Version : MicroPython v1.21.0 on 2023-10-05 liegen ? oder gibt es diese Datei irgendwo?
mfg Karl Meyer
Peter Schildt
@ Jürgen Grzesina
Danke, warte noch auf den Dienst Whatsapp. Bleibt spannend;-)
mfG. Peter
Andreas Wolter
@Peter Schildt: Danke für den Hinweis. Oben in der Liste war es korrekt, unten in der Liste war es falsch verlinkt. Wir haben es gefixt.
Grüße,
Andreas Wolter
AZ-Delivery Blog
Peter Schildt
@ Jürgen Grzesina
Interessanter Ansatz, aber timeout.py kein download möglich:-(
mfG. Peter