After 5 years our gifted night turtle gave up the spirit and my children were very sad. Especially in the evening my children always enjoyed it when the turtle has illuminated the bedroom with adjustable brightness. As a maker and now a skillful designer with the 3D printer, I didn't want to miss the chance to build my own night light. The idea behind it was that the night light can be projected into the bedroom by means of transparent filament and, if necessary, simply expanded. So that Micropython, or Pyhton in general, is again a bit refreshed, everything should be created in this programming language. At the same time, I would like to show you how you can simply program a cancellation of buttons yourself without having to fall back on Micropython's functions.
Required hardware and software
The hardware for this test setup is relatively manageable, see Table 1.
|
POS |
Number |
Component |
link |
|
1 |
1 |
Raspberry Pi Pico |
|
|
2 |
1 |
Strip grid board |
|
|
3 |
1 |
Neopixel ring with 32 WS2812 |
|
| 1 |
Alternatively: Neopixel ring with 12 WS2812B 37mm (then with a changed housing and adapted source code) |
|
|
|
4 |
1 |
Hex distance owner |
|
|
5 |
1 |
560 pieces of Breadboard Jumper Wires |
|
|
6 |
1 |
Multiple M2 socket screws |
|
|
7 |
1 |
Print button |
Table 1: Hardware parts for the WS2812 night light
The Amazon links are particular examples, but with the neopixel ring, you should make sure that this has a maximum outer diameter of 104 mm! Otherwise, my housing provided will not fit. At the same time, I do not recommend using the nylon version for the hex spacers, but from brass. This saves you frustration in the case of the case when turning in.
In addition, you need soldering tools (soldering station, soldering, magnifying glass, etc.) and tools to edit the strip grid board (separate out and separate copper contact area).
If you want to use my model for the night light, you need a 3D printer and filament. The best thing has proven to be a black filament for the floor and transparent for all other parts.
So that you can use and modify the program later, please use the program Thonny, which is available for all common operating systems (and the Raspberry Pi). Our author Andreas Wolter has a good Entry blog written that explains the basic facility. The Series of contributions From Bernd Albrecht on the same topic is a little more detailed.
The basic idea for the night light and the components
As mentioned at the beginning of this post, I needed a quick solution for my children for a new night light. The old projected sea waves onto the ceiling with an engine and LEDs. But I wanted more color and the room in soft gentle tones with not too hectic changes in color. In order for this to work, I needed a solid surface and used the strip grid board to which the PICO and the plugs for further hardware should be soldered. The outer walls had to be transparent and offer space for the WS2812 neopixel ring. This is used on the top of the housing. The highlight is that the lid should be interchangeable. Because I will already prepare the board so that other sensors can be used. This can be a PIR motion detector, for example.
With these ideas in my head and some Fusion 360, I created my housing, see Image 1.
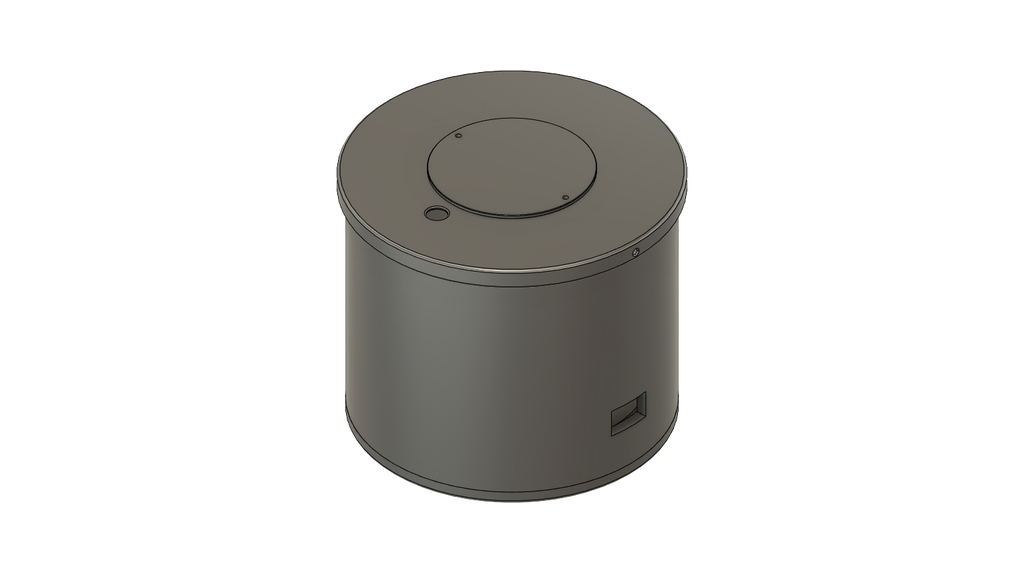
Image 1: The ready-made housing in Fusion 360
In order for it to work, the soil had to be created so that the pico and strip grid board could be installed. In my case, the circuit board must be round because the floor has exactly this shape, see Image 2.
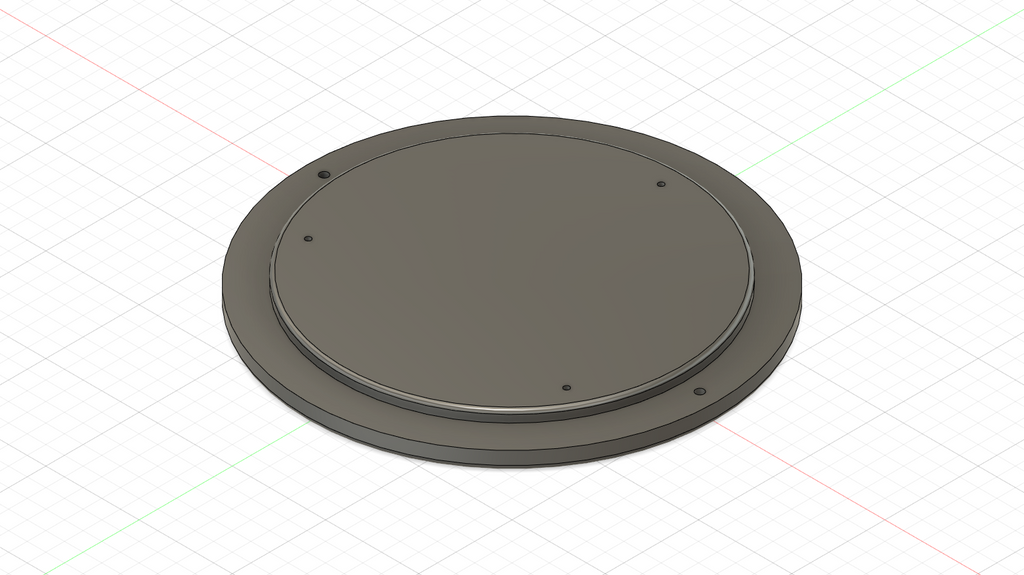
Image 2: The bottom of the night light
In order for the PICO to do justice to its task later, the cabling must first be made, see Image 3. At this point, I have not yet planned another PIN for the approximation sensor, but it has been added during my soldering work. This cannot, therefore, be seen in the basic wiring.

Image 3: The basic scheme of the wiring
Despite the manageable cabling, the board was soldered quite extensively in the end, than expected, see Image 4. Last but not least, I had to make sure that the boreholes are sitting in the right place. A corresponding drawing to set the holes correctly can be found in my Repository.

Image 4: Raspberry Pi Pico soldered with all adapters
As to be seen in Image 5, I decided against the connections to the button and later. even to make a motion detector via directly soldered points.
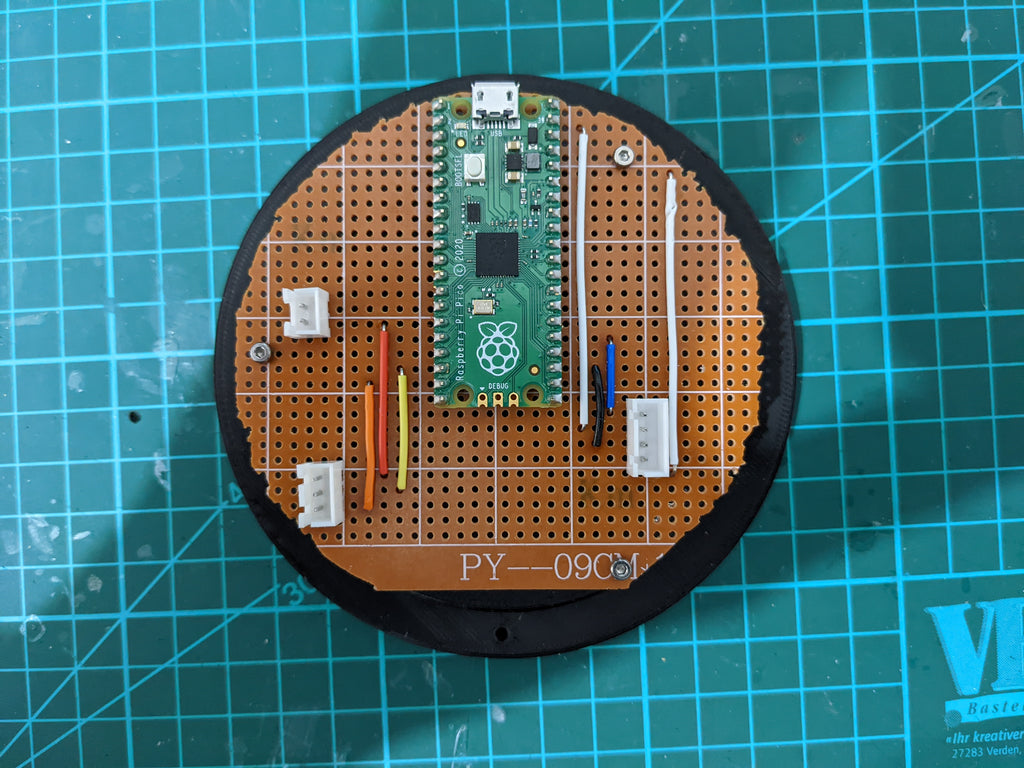
Image 5: Board with all plugs mounted on the base plate
Instead, I used JST-XH connectors, which I can quickly and easily exchange connections. I have to mention that the plugs then have to be crimped here, but with a bit of practice it also succeeds.
With the lampshade and the lid, I had to come up with something. On the one hand, I did not want to screw the WS2812B ring, but it should be fixed in the lampshade so that it cannot just fall around inside. Ultimately, I constructed a simple groove on the lampshade in which the ring is fixed with a little strength. The pressure itself is not complicated, see Image 6, but due to the height of the lampshade, the pressure of all parts took almost 20 hours.

Image 6: The inner life and all parts of the night light
There are holes on the side of the lid and the lampshade to fix everything with small M2 screws. Basically, the hardware for the night light is ready and there is only the programming.
The software
It was originally planned to program the Raspberry Pi Pico with the Arduino IDE. However, precisely because the use of Arduino IDE together with a Raspberry Pi Pico has repeatedly led to problems with me in the past, I chose Micropython. An advantage at this point is that the programs do not have to be compiled again and again and I see a result faster.
So that the Raspberry Pi Pico can also control the WS2812B ring, I searched for a suitable and functioning library for a long time. I could have a relatively slim lib with the name neopixel.py on Github find, see Code 1.
Download neopixel.py Quellcode
import array, time
from machine import Pin
import rp2
# PIO state machine for RGB. Pulls 24 bits (rgb -> 3 * 8bit) automatically
.asm_pio(sideset_init=rp2.PIO.OUT_LOW, out_shiftdir=rp2.PIO.SHIFT_LEFT, autopull=True, pull_thresh=24)
def ws2812():
T1 = 2
T2 = 5
T3 = 3
wrap_target()
label("bitloop")
out(x, 1) .side(0) [T3 - 1]
jmp(not_x, "do_zero") .side(1) [T1 - 1]
jmp("bitloop") .side(1) [T2 - 1]
label("do_zero")
nop().side(0) [T2 - 1]
wrap()
# PIO state machine for RGBW. Pulls 32 bits (rgbw -> 4 * 8bit) automatically
.asm_pio(sideset_init=rp2.PIO.OUT_LOW, out_shiftdir=rp2.PIO.SHIFT_LEFT, autopull=True, pull_thresh=32)
def sk6812():
T1 = 2
T2 = 5
T3 = 3
wrap_target()
label("bitloop")
out(x, 1) .side(0) [T3 - 1]
jmp(not_x, "do_zero") .side(1) [T1 - 1]
jmp("bitloop") .side(1) [T2 - 1]
label("do_zero")
nop() .side(0) [T2 - 1]
wrap()
# Delay here is the reset time. You need a pause to reset the LED strip back to the initial LED
# however, if you have quite a bit of processing to do before the next time you update the strip
# you could put in delay=0 (or a lower delay)
#
# Class supports different order of individual colors (GRB, RGB, WRGB, GWRB ...). In order to achieve
# this, we need to flip the indexes: in 'RGBW', 'R' is on index 0, but we need to shift it left by 3 * 8bits,
# so in it's inverse, 'WBGR', it has exactly right index. Since micropython doesn't have [::-1] and recursive rev()
# isn't too efficient we simply do that by XORing (operator ^) each index with 3 (0b11) to make this flip.
# When dealing with just 'RGB' (3 letter string), this means same but reduced by 1 after XOR!.
# Example: in 'GRBW' we want final form of 0bGGRRBBWW, meaning G with index 0 needs to be shifted 3 * 8bit ->
# 'G' on index 0: 0b00 ^ 0b11 -> 0b11 (3), just as we wanted.
# Same hold for every other index (and - 1 at the end for 3 letter strings).
class Neopixel:
def __init__(self, num_leds, state_machine, pin, mode="RGB", delay=0.0001):
self.pixels = array.array("I", [0 for _ in range(num_leds)])
self.mode = set(mode) # set for better performance
if 'W' in self.mode:
# RGBW uses different PIO state machine configuration
self.sm = rp2.StateMachine(state_machine, sk6812, freq=8000000, sideset_base=Pin(pin))
# dictionary of values required to shift bit into position (check class desc.)
self.shift = {'R': (mode.index('R') ^ 3) * 8, 'G': (mode.index('G') ^ 3) * 8,
'B': (mode.index('B') ^ 3) * 8, 'W': (mode.index('W') ^ 3) * 8}
else:
self.sm = rp2.StateMachine(state_machine, ws2812, freq=8000000, sideset_base=Pin(pin))
self.shift = {'R': ((mode.index('R') ^ 3) - 1) * 8, 'G': ((mode.index('G') ^ 3) - 1) * 8,
'B': ((mode.index('B') ^ 3) - 1) * 8, 'W': 0}
self.sm.active(1)
self.num_leds = num_leds
self.delay = delay
self.brightnessvalue = 255
# Set the overal value to adjust brightness when updating leds
def brightness(self, brightness=None):
if brightness == None:
return self.brightnessvalue
else:
if brightness < 1:
brightness = 1
if brightness > 255:
brightness = 255
self.brightnessvalue = brightness
# Create a gradient with two RGB colors between "pixel1" and "pixel2" (inclusive)
# Function accepts two (r, g, b) / (r, g, b, w) tuples
def set_pixel_line_gradient(self, pixel1, pixel2, left_rgb_w, right_rgb_w, how_bright = None):
if pixel2 - pixel1 == 0:
return
right_pixel = max(pixel1, pixel2)
left_pixel = min(pixel1, pixel2)
for i in range(right_pixel - left_pixel + 1):
fraction = i / (right_pixel - left_pixel)
red = round((right_rgb_w[0] - left_rgb_w[0]) * fraction + left_rgb_w[0])
green = round((right_rgb_w[1] - left_rgb_w[1]) * fraction + left_rgb_w[1])
blue = round((right_rgb_w[2] - left_rgb_w[2]) * fraction + left_rgb_w[2])
# if it's (r, g, b, w)
if len(left_rgb_w) == 4 and 'W' in self.mode:
white = round((right_rgb_w[3] - left_rgb_w[3]) * fraction + left_rgb_w[3])
self.set_pixel(left_pixel + i, (red, green, blue, white), how_bright)
else:
self.set_pixel(left_pixel + i, (red, green, blue), how_bright)
# Set an array of pixels starting from "pixel1" to "pixel2" (inclusive) to the desired color.
# Function accepts (r, g, b) / (r, g, b, w) tuple
def set_pixel_line(self, pixel1, pixel2, rgb_w, how_bright = None):
for i in range(pixel1, pixel2 + 1):
self.set_pixel(i, rgb_w, how_bright)
# Set red, green and blue value of pixel on position
# Function accepts (r, g, b) / (r, g, b, w) tuple
def set_pixel(self, pixel_num, rgb_w, how_bright = None):
if how_bright == None:
how_bright = self.brightness()
pos = self.shift
red = round(rgb_w[0] * (how_bright / 255))
green = round(rgb_w[1] * (how_bright / 255))
blue = round(rgb_w[2] * (how_bright / 255))
white = 0
# if it's (r, g, b, w)
if len(rgb_w) == 4 and 'W' in self.mode:
white = round(rgb_w[3] * (how_bright / 255))
self.pixels[pixel_num] = white << pos['W'] | blue << pos['B'] | red << pos['R'] | green << pos['G']
# Converts HSV color to rgb tuple and returns it
# Function accepts integer values for , and
# The logic is almost the same as in Adafruit NeoPixel library:
# https://github.com/adafruit/Adafruit_NeoPixel so all the credits for that
# go directly to them (license: https://github.com/adafruit/Adafruit_NeoPixel/blob/master/COPYING)
def colorHSV(self, hue, sat, val):
if hue >= 65536:
hue %= 65536
hue = (hue * 1530 + 32768) // 65536
if hue < 510:
b = 0
if hue < 255:
r = 255
g = hue
else:
r = 510 - hue
g = 255
elif hue < 1020:
r = 0
if hue < 765:
g = 255
b = hue - 510
else:
g = 1020 - hue
b = 255
elif hue < 1530:
g = 0
if hue < 1275:
r = hue - 1020
b = 255
else:
r = 255
b = 1530 - hue
else:
r = 255
g = 0
b = 0
v1 = 1 + val
s1 = 1 + sat
s2 = 255 - sat
r = ((((r * s1) >> 8) + s2) * v1) >> 8
g = ((((g * s1) >> 8) + s2) * v1) >> 8
b = ((((b * s1) >> 8) + s2) * v1) >> 8
return r, g, b
# Rotate pixels to the left
def rotate_left(self, num_of_pixels):
if num_of_pixels == None:
num_of_pixels = 1
self.pixels = self.pixels[num_of_pixels:] + self.pixels[:num_of_pixels]
# Rotate pixels to the right
def rotate_right(self, num_of_pixels):
if num_of_pixels == None:
num_of_pixels = 1
num_of_pixels = -1 * num_of_pixels
self.pixels = self.pixels[num_of_pixels:] + self.pixels[:num_of_pixels]
# Update pixels
def show(self):
# If mode is RGB, we cut 8 bits of, otherwise we keep all 32
cut = 8
if 'W' in self.mode:
cut = 0
for i in range(self.num_leds):
self.sm.put(self.pixels[i], cut)
time.sleep(self.delay)
# Set all pixels to given rgb values
# Function accepts (r, g, b) / (r, g, b, w)
def fill(self, rgb_w, how_bright = None):
for i in range(self.num_leds):
self.set_pixel(i, rgb_w, how_bright)
time.sleep(self.delay)
Code 1: The neopixel.py library
Basically, the library later controls the individual LEDs. You may know this from the Arduino DIE. Load the file on the Pico. For this, it is best to just create a new file, paste the content from code 1 and save it on the pico with the name neopixel.py. If this file is loaded on the Pico, we come to the main.py.
Diese muss:
- Debounce the current pushbutton, query the status, and save it
- Control the WS2812B ring, no matter how many elements
- Pre-calculate the color gradient, here using HSV, see Wikipedia
- Monitor the timers and execute appropriate actions at the end
- The first question that you will probably now ask yourself, is why I mentioned at the beginning that I wrote my own depressing function. Yes, there is something like that in Micropython, but I had the problem that this function did not deliver the result that I always used from my Arduino ID programming. Therefore, I wanted to create something of my own, also to create something of my programming knowledge and write functions in Micropython.
The result is the function of code 2:
 def btn_pressed():
     global Btnlaststate, tmlastupdate
     Btnstate = False
     IF Btnlaststate != btn.value():
         tmlastupdate = Ticks_MS()
     IF (Ticks_MS() - tmlastupdate) > 100:
         Btnstate = btn.value()

     Btnlaststate = btn.value()
     return Btnstate
Code 2: The function to depress a button
Actually, there are nine lines that are explained very quickly. With every run my function is btn_pressed () Called and the last stored value is checked. Once this has changed, a variable is set with the current time and checked in the next runs whether the limit of 100ms is reached at some point. At the same time, the current stand is saved at the end of the function so that this timer function is only carried out at every change. Once 100ms have expired, the button status is delivered. So that's Problem of the bump Quite simply solved. The complete code, see code 3, is not complex, but with just 75 lines (spaces and comments lines with you) quite slim.
From neopixel import Neopixel
From time import sleep, Ticks_MS
From machine import Pin code,timer
## Set up
Num_Leds = 32
Led_pin = 19
Btn_pin = 10
Sensor_pin = 14 #For Later Feature
pixels = Neopixel(Num_Leds, 0, Led_pin, "GRB")
pixels.Brightness(30)
btn = Pin code(Btn_pin, Pin code.IN, Pin code.Pull_Down)
## Constants
Deftimbtn = 15*60*1000 #Define for lights on
Timecolorchange = 50 #Timer Colorchange
Timecoloroff = 0 #Timer
red = pixels.Colorhsv(0, 255, 255)
green = pixels.Colorhsv(21845, 255, 255)
blue = pixels.Colorhsv(43691, 255, 255)
## variables
lastvalue = Ticks_MS()
load = Ticks_MS()
Bacticight = False
button pressed = False
Btnlaststate = False
btncontrol = False
tmlastupdate = 0
hue = 0
#Thats a Simple Function to DeBoonce Btn
def btn_pressed():
global Btnlaststate, tmlastupdate
Btnstate = False
IF Btnlaststate != btn.value():
tmlastupdate = Ticks_MS()
IF (Ticks_MS() - tmlastupdate) > 100:
Btnstate = btn.value()
Btnlaststate = btn.value()
return Btnstate
## loop
while True:
button pressed = btn_pressed() #Check button pressed or not
#Function-Loop IF Button Pressed
IF button pressed and need btncontrol:
IF need Bacticight:
Timecoloroff = Deftimbtn
Bacticight = True
load = Ticks_MS()
Else:
Timecoloroff = 0
Bacticight = False
btncontrol = True
elif need button pressed and btncontrol:
btncontrol = False
#Function-Loop to Recolor LEDs
IF (Ticks_MS() - lastvalue) > Timecolorchange and Bacticight:
hue += 50
IF(hue > 65535):
hue = 0
color = pixels.Colorhsv(hue, 255, 255)
pixels.fill(color)
pixels.show()
lastvalue = Ticks_MS()
elif need Bacticight:
hue = 0
color = pixels.Colorhsv(hue, 0, 0)
pixels.fill(color)
pixels.show()
#Timer to Set Lights Off
IF (Ticks_MS() - load) > Timecoloroff:
Bacticight = False
This brings the advantage that you (if the project is like this) can be modified quite quickly. The concept of how the WS2812B changes its color is also quickly visible. Ultimately, the value for the color range is increased every 50ms. The time is over the variable Timecolorchange adjustable. If the code exceeds the magical limit of 65535 (16-bit integers without a sign), the color area value is set again to 0.
The drawing, the models, and the program
Since I designed everything with Autodesk Fusion 360, I can't pass the original models on. However, slicers like Cura can handle the 3MF format, which I am now very happy to use to export. I also provided the scale-like drawing for cutting out the strip grid board on DIN A4 in my GitHub Repository.
As requested by my last posts for PICO, you will not only find the program, but also the library used on GitHub.
Summary
As you can see, you can give children a little pleasure with something soldering, a 3D printer, and a few lines of microphone. When I showed my wife and children's finished project, my eyes were big and the children's room no longer shines "only" blue, but in "all rain floor colors".
At the same time, I kept the project and the code so that you can change brightness, color change and number of LEDs without any problems. It is also possible to solder further hardware with the Raspberry Pico, in my case a movement sensor, which then shines the lamp. Let your imagination run free, the basis for exciting projects is made.

Image 7: night light in action
Further projects for AZ-Delivery From me, can also find it under https://github.com/M3taKn1ght/Blog-Repo.


2 comments
Andreas Wolter
@Jens: danke für den Hinweis. Wir haben das korrigiert.
Grüße,
Andreas Wolter
AZ-Delivery Blog
Jens
Hallo und vielen Dank für die gute Idee
leider hat sich im Script in Zeile 16 ein Fehler eingeschlichen => dort steht jetzt:
0 = 50 #Timer colorchange
Dort muss aber stehen:
TIMECOLORCHANGE = 50 #Timer colorchange
… dann funktioniert es einwandfrei.
Trotzdem vielen Dank für die gute Arbeit.
Ich freue mich schon auf die vielen neuen Anregungen und Ideen.