This post is also available as PDF file.
Today we will be the parts from the four previous consequences
- AHT10 - Sensor for temperature and rel. Humidity
- It will be light
- Water on
- Pelting heating
Merging together and equipping with a WLAN connection via UDP. This enables the seed box to send us the condition of the various hardware groups to the cell phone or tablet. With the MIT-APP-Inventor 2, I developed an app that can be used to receive the data on the cell phone and also be presented in a reasonable form. There is a lot to do, we tackle it in the new episode
Micropython on the ESP32 and ESP8266
today
Part 5 - WLAN for the Sowing Box
The hardware and the programs are listed in the above, earlier articles mentioned and shown in detail. Today I concentrate on the topics of WLAN access and cell phone app. That is why there is no hardware list in this post. You can select the individual assemblies according to your ideas, assemble and then combine the necessary program parts into a complete program. The hardware lists can be found in the above articles.
The software
For flashing and the programming of the ESP32:
Thonny or
Used firmware for the ESP32:
The micropython programs for the project:
SSD1306.PY Hardware driver for the OLED display
oled.py API for the OLED display
temperature.py The program for light control
aht10.py API for the AHT10 climate sensor
light.py Lighting control
water.py Irrigation control
greenhouse.py The complete package
Micropython - Language - Modules and Programs
To install Thonny you will find one here Detailed instructions (English version). There is also a description of how that Micropython firmware (As of 18.06.2022) on the ESP chip burned becomes.
Micropython is an interpreter language. The main difference to the Arduino IDE, where you always flash entire programs, is that you only have to flash the Micropython firmware once on the ESP32 so that the controller understands micropython instructions. You can use Thonny, µpycraft or ESPTOOL.PY. For Thonny I have the process here described.
As soon as the firmware has flashed, you can easily talk to your controller in a dialogue, test individual commands and see the answer immediately without having to compile and transmit an entire program beforehand. That is exactly what bothers me on the Arduino IDE. You simply save an enormous time if you can check simple tests of the syntax and hardware to trying out and refining functions and entire program parts via the command line before knitting a program from it. For this purpose, I always like to create small test programs. As a kind of macro, they summarize recurring commands. Whole applications then develop from such program fragments.
Autostart
If the program is to start autonomously by switching on the controller, copy the program text into a newly created blank tile. Save this file under boot.py in WorkSpace and upload it to the ESP chip. The program starts automatically the next time the reset or switching on.
Test programs
Programs from the current editor window in the Thonny-IDE are started manually via the F5 button. This can be done faster than the mouse click on the start button, or via the menu run. Only the modules used in the program must be in the flash of the ESP32.
In between, Arduino id again?
Should you later use the controller together with the Arduino IDE, just flash the program in the usual way. However, the ESP32/ESP8266 then forgot that it has ever spoken Micropython. Conversely, any espressif chip that contains a compiled program from the Arduino IDE or AT-Firmware or Lua or ... can be easily provided with the micropython firmware. The process is always like here described.
The sowing box becomes WLAN-capable
For WLAN access we need a WLAN router, such as a Fritzbox or another radio router. In order for the ESP32 to land there, its Mac address must be known to the router. So we have to find out what the MAC address of the ESP32 is. So that the ESP32 can tell us, we have to create a radio interface, and we need the module to do this network. Later the module will be socket needed. We both import in one line. This is followed by all other classes and objects. The only external module is AHT10. The file aht10.py must therefore be uploaded to the ESP32.
import network, socket
From machine import Softi2c, Pin code, ADC, PWM
From time import sleep,Ticks_MS, Sleep_ms
From OLED import OLED
import sys
From neopixel import Neopixel
From OneWire import OneWire
From DS18x20 import DS18x20
From AHT10 import AHT10
import GC
You need your own for the connection to the router Credentials (Access data). Carry them at mysid us mypass a.
# ************* Declarize ****************
#
# debug = true
debug=False
# **********************************************************
# Enter your own access data here
mysid = 'here goes your ssid'
mypass = "Here goes your password"
monitor=("10.0.1.10",9091)
client=("10.0.1.65",9091)
tablet=("10.0.1.40",9001)
server=("10.0.1.100",9119)
addresses=[client] #, client, tablet, server
myport=9009
# **********************************************************
If the data from the ESP32 is to be sent to several recipients, then please carry the names of the connections, separated with a comma, into the list addresses a.
The following block declares the objects used. You can find the descriptions in the respective articles.
I2C=Softi2c(scl=Pin code(22),sda=Pin code(21))
D=OLED(I2C,Heightw=32)
# Water supply
tub=Pin code(23, Pin code.IN)
glass =Pin code(19, Pin code.IN)
pump=Pin code(12,Pin code.OUT, value=0)
AHT=AHT10(I2C)
pwmpin=Pin code(27,Pin code.OUT,value=0)
PWM=PWM(pwmpin,5)
PWM.freq(5)
PWM.duty(0)
# Light
LDR=ADC(Pin code(34))
LDR.attack(ADC.Attn_0db)
LDR.Width(ADC.Width_10bit)
maxcnt=1023
neo=16
Neocnt=128
neopin=Pin code(neo,Pin code.OUT)
NP = Neopixel(neopin, Neocnt)
out of=(0,0,0)
at =(127,0,100)
state=("out of","at")
neorel=Pin code(15,Pin code.OUT,value=0)
# Temperature
hater=Pin code(13,Pin code.OUT, value=0)
vent=Pin code(17,Pin code.OUT, value=0)
DS18=14
dspin=Pin code(DS18)
DS = DS18x20(OneWire(dspin))
Heatsink,EARTHTEMP = DS.scan()
print("Chip-Rom codes:",EARTHTEMP,Heatsink)
button=Pin code(0,Pin code.IN,Pin code.Pull_up)
When building a connection, the ESP32 provides the status in the form of numerical values. The Dictionary connect status Translates them into plain text.
connect status = {
    1000: "Stat_idle",
    1001: "Stat_Connecting",
    1010: "Stat_got_ip",
    202:  "Stat_wrong_Password",
    201:  "No ap found",
    5:    "Unknown"
    }
The ESP32 provides us with the MAC address as a bytes object. In many cases, this is absolutely cryptic.
>>> import network
>>> nic = network.WIRELESS INTERNET ACCESS(network.Sta_if)
>>> nic.active(True
>>> nic.config('Mac')
b '\ s \ x08 \ xd1 \ xd2a'
def hexmac(bytemac):
  """
  The HexMac function takes the Mac address in the bytecode and
  forms a string for the rehabilitation
  """
  MacString =""
  for I in range(0,len(bytemac)):     # For all byte values
    MacString += hex(bytemac[I])[2:]  # String from 2 to the end
    IF I <len(bytemac)-1 :            # Delimiter
      MacString +="-"                 # except for the last byte
  return MacString
The function hexmac() makes it a readable version. We will also call this function from our program later. However, you can already enter the MAC address in the security settings of your router. The associated manual reveals how this works.
>>> hexmac(nic.config('Mac'))
'5c-73-8-d1-d2-41'
You can take over a number of functions one to one from the previous episodes. There you will also find the work of the way of working.
def light(Val=at):
r,G,B=Val
IF r != 0:
neorel.value(1)
sleep(0.3)
for I in range(Neocnt):
NP[I]=(r,G,B)
NP.write()
Else:
neorel.value(0)
def heating(Val=None):
assert Val in (0,1,None)
IF Val is need None:
hater.value(Val)
Else:
return state[hater.value()]
def pump(Val=None):
assert Val in (0,1,None)
IF Val is need None:
pump.value(Val)
Else:
return state[pump.value()]
def Fan(Val=None):
assert Val in (0,1,None)
IF Val is need None:
vent.value(Val)
Else:
return state[vent.value()]
def temperature(C):
DS.convert_temp()
Sleep_ms(750)
return DS.read_temp(C)
def Getadc(ADC,n=50):
sum=0
for _ in range(n):
sum = sum + ADC.read()
AVG = intimately(sum/n)
return AVG
def Time-out(T):
begin=Ticks_MS()
def compare():
return intimately(Ticks_MS()-begin) >= T
return compare
def sound(duration,freq=8):
period=Time-out(duration*1000)
PWM.freq(freq)
PWM.duty(512)
while need period():
passport
I have changes in the functions water level(), climate() and lighting() performed. Here were views of the function in various places send() inserted. A string is transmitted that sends the condition of the assemblies to the cell phone or other recipients. Each string is composed of a function code and a value. You are by one ":" separated. The following codes are used.
|
code |
Type |
remark |
|
S |
intimately |
ADC ambient light |
|
L |
0|1 |
Lighting LEDs from | at |
|
F |
0|1 |
Fan engine out | at |
|
C |
0|1 |
Relays on the pelt animal element at |
|
H |
float |
Value of the rel. humidity |
|
T |
float |
Air temperature |
|
G |
0|1 |
Leaving full |
|
W |
0|1 |
Tub empty | full |
|
P |
0|1 |
Pump out | at |
|
K |
float |
Heat body temperature |
|
D |
0|1 |
Warning from | at |
|
B |
float |
Floor / water temperature |
def water level():
    clan=tub.value() # 1 = empty; 0 = full
    level glass=glass.value()
    state=0 IF level glass == 1 Else 1
    send("G:{}".format(state))
    IF debug: print("Tub",clan)
    IF clan == 0:
        IF debug: print("Tub level ok")
        pump(0)
        send("W: 1")
        send("P: 0")
        send("D: 0")
        return 1 # Tub ok
    Else:
        # Tub too little
        send("W: 0")
        IF debug: print("Glass",level glass)
        IF level glass==0:
            IF debug: print("Glass level ok, pump")
            pump(1) # Water from the glass to the tub
            send("P: 1")
            send("D: 0")
            send("G: 1")
            return 2
        Else:
            IF debug: print("Fill the glass")
            pump(0) # Pump out
            send("P: 0")
            send("D: 1")
            send("G: 0")
            sound(2,5) # No water in the pool
            return 0
The if debugLines provide a reference to the condition of the system in the terminal.
Sendses were also in the function climate() built-in. You are welcome to change the limit values for the temperatures according to your wishes.
def climate():
    tempkk=temperature(Heatsink)
    temporary=temperature(EARTHTEMP)
    AHT.triggerDevice()
    tempo=AHT.gettem temp()
    wet=AHT.gefhum()
    send("H: {: 0.2f}".format(wet))
    send("T: {: 0.2f}".format(tempo))
    send("B: {: 0.2f}".format(temporary))
    D.writer("Temp: {: 0.2f}*C".format(tempo),0,1)
    D.writer("Hum: {: 0.2f} %".format(wet),0,2)
    D.writer("Temp_sub: {0:> 4.1f} %".\
              format(temporary),0,2)
    send("K: {: 0.2f}".format(tempkk))
    IF debug: print("Temperature: {: 0.2f}".format(tempo))
    IF tempo >= 22:
        IF debug: print("Too hot, luefter on")
        send("F: 1")
        send("C: 0")
        Fan(1)
        heating(0)
    elif tempo < 19: #
        IF debug: print("Too cool")
        IF debug: print("KK-Temp:",tempkk)
        Fan(1)
        send("F: 1")
        IF tempkk <= 25:
            IF debug: print("KK Temp ok, heat")
            send("C: 1")
            heating(1)
        Else:
            IF debug: print("KK too hot, just wound")
            heating(0)
            send("C: 0")
    Else:
        IF debug: print("Temperature OK")
        heating(0)
        send("C: 0")
        IF tempkk >= 25:
            IF debug: print("Heating")
            Fan(1)
            send("F: 1")
        Else:
            IF debug: print("No Action Needed")
            Fan(0)
            send("F: 0")
def lighting():
    H=Getadc(LDR)
    IF debug: print("LDR:",H)
    IF H > 200:
        light(at)
        respect="L: 1"
    Else:
        light(out of)
        respect="L: 0"
    send(respect)
    return H
The functions have been added earth() and send().
def earth():
    tempered=temperature(EARTHTEMP)
    send("B: {: 0.2f}".format(tempered))
def send(sub):
    code=sub.encode()
    IF debug: print("Send",sub)
    for ADR in addresses:
        IF debug: print("Send",sub,ADR)
        sentence=S.broadcast(sub,ADR)
        sleep(0.1)
    sleep(0.1)
earth() transmits the floor or water temperature that is recorded with one of the DS18B20.
send() takes one of the strings described above, convert it into a bytes object and sends it to all the recipients that are in the list addresses are included.
The following block connects to the router. After instantiation of the network interface object and its activation, we get the MAC address. If the ESP32 is to be stated from the cell phone, it is good if it gets a fixed IP address, here is 10.0.1.180.
Please like the IP addresses and ports on your home network.
Now an attempt is made to establish a connection. While this is running, a point is issued every second. The process takes around 2 to 5 seconds. Finally, we can be output on the display - three seconds to read.
nic=network.WIRELESS INTERNET ACCESS(network.Ap_if)
nic.active(False)
nic = network.WIRELESS INTERNET ACCESS(network.Sta_if) # creates WiFi object Nic
nic.active(True) # Nic turn on
Mac = nic.config('Mac') # Call base Mac address and
mymac=hexmac(Mac) # convert into a hex digit sequence
print("Mac station: \ t"+mymac+"\ n") # spend
sleep(1)
# sys.exit ()
Staconf = nic.ifconfig(("10.0.1.180","255.255.255.0",\
"10.0.1.20", "10.0.1.100"))
IF need nic.Isconnected():
nic.connect(mysid, mypass)
print("Status:", nic.Isconnected())
D.writer("WLAN Connecting",0,1)
point="............"
n=1
while nic.status() != network.Stat_got_ip:
print(".",end='')
D.writer(point[0:n],0,2)
n+=1
sleep(1)
print("\ nstatus:",connect status[nic.status()])
D.clearall()
Staconf = nic.ifconfig()
print("Sta-IP: \ t \ t",Staconf[0],"\ nsta-netmask: \ t",Staconf[1],\
"\ nsta-gateway: \ t",Staconf[2] ,sep='')
D.writer(Staconf[0],0,0)
D.writer(Staconf[1],0,1)
D.writer(Staconf[2],0,2)
sleep(3)
We still lack the door for the data. This opens the UDP socket Sthat we have to create first. Then we set its properties and bind it to the port specified at the beginning. A timeout of 0.1 seconds is important so that the reception loop does not block the main loop.
# ***************** Socket for UDP-Server ****************
S = socket.socket(socket.Af_inet, socket.Sock_dgram)
S.setsockopt(socket.Sol_socket,socket.So_RuseAddr,1)
S.binding(('', myport))
print("X-Minting on Port",myport)
S.set(0.1) # Timeout, so 'while True:'
D.writer("On port {}".format(myport),0,2)
sleep(3)
D.clearall()
D.writer("Green House",2,0)
Right from the start we clean up the memory and then check whether a message has arrived. If the receiving buffer we have with recvfoma() Querying, empty is, an exception is thrown after 0.1 seconds, which we have with except intercept. In the try-Block should now Parsing follow the message.
while 1:
    GC.collect()
    try:
        Rec,ADR=S.recvfoma(10)
        Rec=Rec.decode()
        print("Received:",Rec,ADR)
    except :
        passport
    lighting()
    water level()
    climate()
    earth()
    IF debug: sleep(3)
    IF debug: print(" ")
    IF button.value() == 0:
        D.clearall()
        D.writer("Program Canceled",0,0)
        heating(0)
        Fan(0)
        pump(0)
        light(out of)
        sys.exit()
The views of the four functions follow, which call up and send the measured values and conditions. The conclusion is made by the flash key, which enables an orderly exit from the program, with all actuators being switched off. A grinding run takes between 5 and 7 seconds.
The whole program greenhouse.py you can download.
The Andriod app
The with (Massachusetts Institute of Technology) provides with the App Inventor 2 (AI2) A tool with which you can create apps for Android smartphones in the modular system. The tool works via a browser. You don't have to install anything on the PC. So that the result can be seen on your cell phone immediately, the app must AI2 Companion be installed that can be obtained from the Google Playstore. Download and use of both tools are free. But you need a Google account for the login, which is also free. I have how the software is to use in the PDF document With app_inventor_2_ger.pdf described in detail. Please read the tutorial if you have not yet worked with AI2 or if you have never used UDP with it. We need exactly this protocol immediately. The tutorial describes exactly where it gets the expansion and how it needs to be installed.

Figure 1: With AI2 Companion
Go to the side now http://appinventor.mit.edu/ and click on Create apps! Out of the window palette On the far left, the elements for the screen are on the mapping of the cell phone in Viewer pulled. In the Components-Winders are the elements over the button Rename provided with speaking names. We can in the window the properties of the just selected element Graves set. Figure 2 shows the goal of our efforts. We need one for lines with two or more elements Horizontally arrangement from the folder layout. Individual ingredients are placed directly on the screen, like the label Lblblitle with the content Seed box monitor. It comes from the folder User interface. As a name, I give the type of the element through the first three letters, then the name follows with a capital letter. Detailed names also follow with a capital letter. This system is not absolutely necessary, but it later makes it extremely easier to find and assign when working with the blocks. Also scroll through the list of properties with every new element type. The offer is different for every type.

Figure 2: This is what the app should look like

Figure 3: Approach with the Inventor window app at a glance
The tree structure in Components shows very nicely how the individual elements are brought in. harsh stands for horizontal arrangement. I am convinced that you can now get the two lines alone according to the heading. The labels are simply pulled to the area of the horizontally arrangement.

Figure 4: First steps
The area with the IP addresses is a bit more complex. Here two horizontal arrangements (HAR) are housed in a vertical arrangement (var). There are two other element types, text fields (TXT) and buttons (BTN).

Figure 5: combination arrangement
I do not name elements that are not used when programming with the blocks, like the placeholder Label7. Figure 6 shows the testies of the text field txtlocalip. I presented the IP of the cell phone for the text.

Figure 6: Properties of a text field
The next three fields look very easy, in which only one numerical value is output over a label.

Figure 7: Fields for value edition
The area for water supply is also not complicated, only a little more extensive. Because only conditions are displayed and no values, I chose the Switch (SWI) type. Figure 9 shows the properties of a switch. Note that the Enabled field is not activated. As a result, the element can serve as a display, but cannot be operated.

Figure 8: Conditions in the water supply

Figure 9: Properties of a switch
The last five visible areas bring nothing new.

Figure 10: The last visible arrangements
It becomes interesting at the end. Udpxmitter and Udplistener Living in the folder Extensions. You can only see this folder if you, like in Tutorial described that UDP extension from Ullis robot side have installed. There you will also find a detailed description of the available blocks.
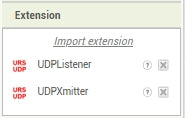
Figure 11: UDP lives in extensions
The elements made of extensions are stored on the screen, but not placed there, but emigrate to the south. There are non -visible objects, as the following:

Figure 12: Unusual elements
The element clock is a timer and as a standard element from the folder Sensor to have, as well as sound from the folder Media.

Figure 13: Clock comes from sensors

Figure 14: Sound from the Media folder
Of course, you need an MP3 file to play. I have one Sirenensound With the tool Audacity tinkered. Files are in the window Media Uploaded that you can find below Components.

Figure 15: Upload files
We are now finished in the designer. Now switch to this area with the Blocks button in the top right of the AI2 window. Below the folder Built-in, with the subordners Control, Logic, Math And so on, you will find the objects declared by us in the same order as in the designer. For every property out of the Properties window, AI2 hides a list of frequently, sets, controls and, if necessary, further blocks when marking the element. As usual in the OOP (OPER Oriented Programing), the attributes of an instance are not accessed directly, but via methods that can also be checked of the values passed. In our micropython program, the review can be found, for example, in the functions pump() and Fan() through assert instead of.
The boots call up an attribute value, which are the blocks with the knob on the left. The setter blocks have a dent on the top left and a bump underneath. Getter are hung in the recess on the right.

Figure 16: Blocks - Getter and Setter
As with Micropython, we start declaring variables.

Figure 17: Declaration of variables
Pull out of the subordeter Variables in Built-in a Initialize global-Block

Figure 18: Blocks for variables
click on Surname and give "code" a. Then get out of the subordeter text The empty string and clip it onto the first block. Repeat the process for all variables. You can find the numerical boots in Math, Udpxmitter1 at the bottom of the window Blocks.
The programs that you build with AI2, I deliberately do not write are event -controlled. If an event occurs, it has to be reacted to it. If the Screen1 Initializing, then the UDP lister must first be stopped, if it runs, then the station's attributes are placed on the IP of our ESP32 and depicted on the screen. We start the lister and hand over the start of the local port number. That corresponds to the command binding From the micropython program. The control When Screen1.initialize Lives in the blocks in the object folder Screen1. By noding the point you can specifically locate any object and property. The colors help with the Built-in objects, which do not contain any object names.

Figure 19: Initialization
After further labels are updated, we put the timer on 1000ms and start it.
The timer keeps checking whether the UDP lister is still running and reports his condition to the screen. Then the timer is restarted.

Figure 20: UDP watchdog
If the data for the network connection is changed, they must also be passed on to the program. The takeover happens with a tip on the button with the label OK, he has the internal name btntakeremote received from us.

Figure 21: Take over data for remote
The takeover of the local connection data looks similar.

Figure 22: Take over local connection data
If the lister reports an error, it must be intercepted. We know that from Micropython, we coded something like this there try and except. Here we get the error code in the label Lblanwer displayed, also the condition of the lister.

Figure 23: UDP error treatment
So far we have only established, maintained and initialized the screen. Where are the data transmitted by the ESP32? Parliamenting the data comes immediately, but do not frighten it! So that you can decipher the font better, I packed the entire listing in three illustrations.
When data has arrived, the message must be saved. From the controll When udplistener.datareceved - Data Let's pull the bed get data, Show the content of the global variables response to, spend it on the screen and check the status of the connection again.
Then we divide the message into code and value share. Remember that the colors of the blocks reveal their origin without an object name. Segment text So it comes just as it is length From the subordinate text.

Figure 24: Parser 1

Figure 25: Parser 2

Figure 26: PARSER 3
Further Else IF-Felder in the control If-Then-else If-Else Find when you click on the blue field with the white wheel. Then pull an element from the left to the right and catch it in there. Else If we don't need, just pull it into the left field.

Figure 27: Expand the IF -Then -else if
To make it easier for you to build program work, I have a tip for you. With a right click on a block, call the context menu. With Duplicate Create a copy of the block. Hook them in at the desired place and adapt the names and properties of the objects. This is faster than getting everything from the blocks window.
Unfortunately, I can't offer a usual listing for download for them, but I have something much better for you. Just load the file first greenhouse.aia down. In the menu item Projects, import the file and have the design and building blocks all in the viewer. But don't forget to adapt the IP addresses and ports to your WLAN before the build. By the way, the whole thing only works in the local network, not from outside. The ESP32 cannot establish a connection from the LAN via the router of the cell phone provider to the cell phone.

Figure 28: Import the project
Now only the download of the finished app on the cell phone is missing. In the tutorial, both options are presented and described from page 16. You can download the app via QR code. To do this, you need a QR code reader, for example QR-Droid from the Playstore.
The other variant is the download on the PC. This path is also described in detail in the tutorial. And this is how the app looks on the cell phone:

Figure 29: Screenshot of the cell phone
Have fun tinkering, building and planting!


