If there's one game that's addictive, it's the maze, where you have to carry a ball along a more or less difficult route, avoiding falling into the holes that prevent you from reaching your goal and having to start the route all over again. No matter how difficult the path is, you always want to reach your goal and will try again and again until you have completed the course. Ball mazes have always existed, in all formats, big and small, on this occasion we will make one that combines electronics and challenge.
This type of game is ideal for playing with the family and especially for the youngest members of the household, as it encourages concentration to reach the goal, as they have to follow the path without falling into the holes, and develops hand-eye coordination. It also encourages perseverance and patience to reach the goal.
The materials required are:
- 3 mm thick balsa wood and white wood glue
The required software is:
-
Arduino IDE
-
Servo.h library (download from arduino.cc)
-
the_amazing_labyrinth.ino
Circuit and description of the modules used


The circuit of this project is very simple, as the KY-023 joystick module is used to control the movement of the maze using the two MG995 servo motors, with each servo motor moving one of the frames and the whole assembly being controlled by the NANO microcontroller. The MB-102 power supply was chosen for the power supply.
Description of how the project works and sketch
The operation of this maze is very simple, it will be completely horizontal when not interacted by the joystick, the initial position in degrees of the two servomotors will be 90 degrees and when interacted with the joystick, the servomotors will change the position of the maze towards the position specified with the joystick to direct the ball towards the selected position. It should be noted that the degrees of movement of the maze should not be very large, between 87 and 93 degrees for both servomotors, in order to adequately control the ball. In this project, the degrees of freedom were set to a total of 6 degrees of movement in each axis, which can be adjusted if desired.
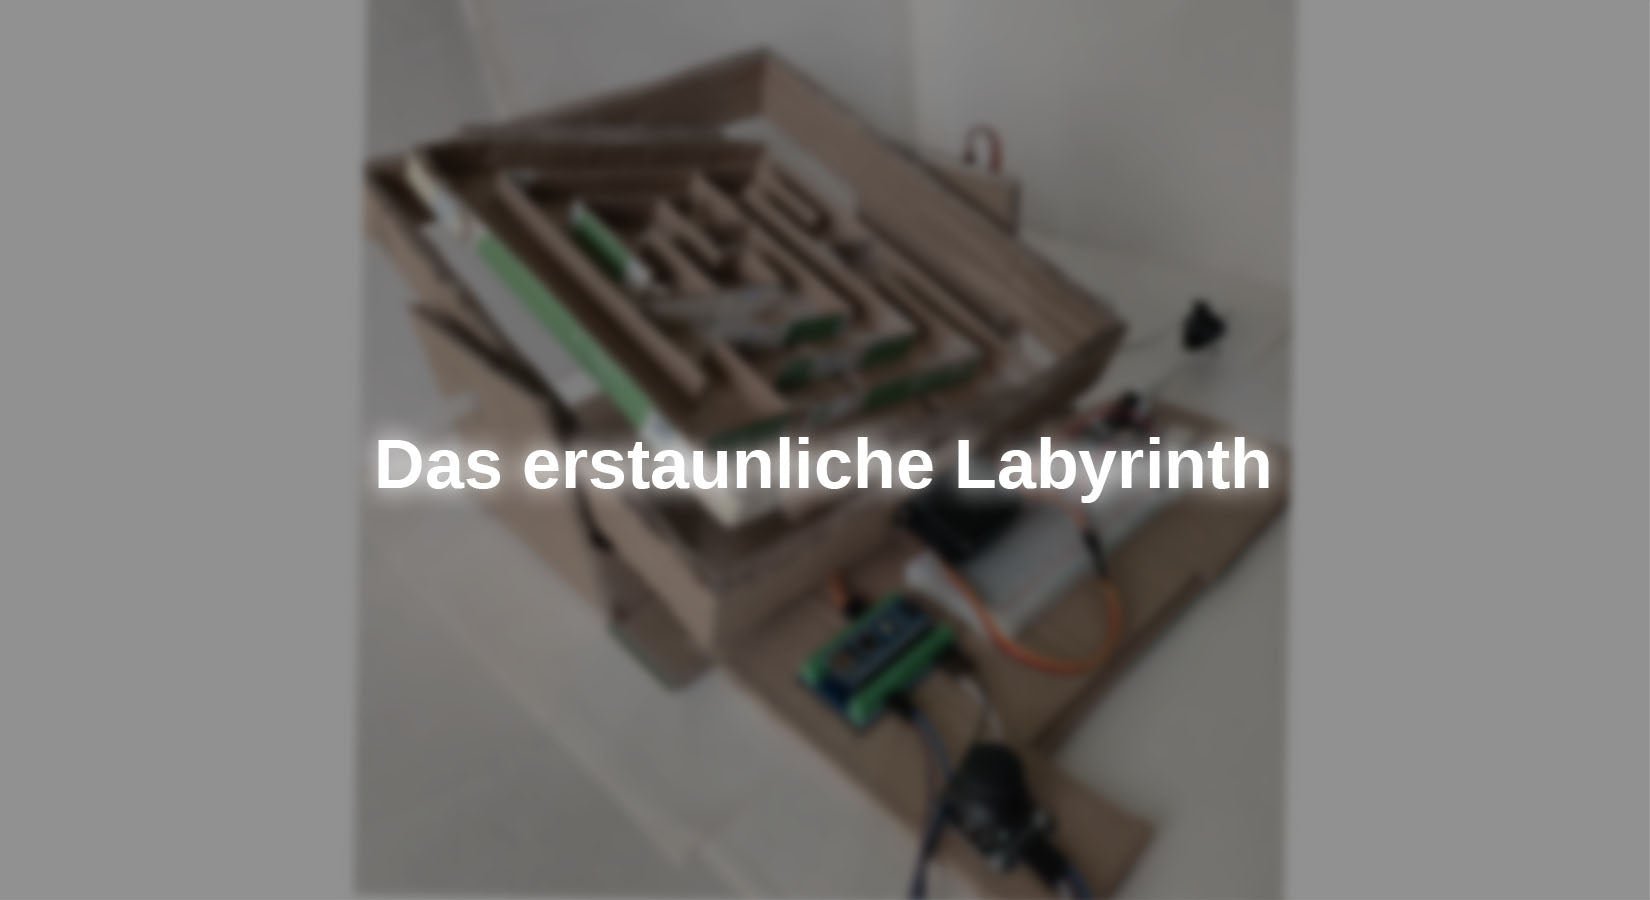
The mechanical structure of the labyrinth consists of two square rings, the base support contains the first servo motor that moves the first ring on one of its axes, this first ring also contains another servo motor that drives the second ring, which is located inside the first ring. The second ring was designed with L-angles so that the path of the labyrinth can be easily changed so that the mechanical assembly is always available and we can obtain a new path by changing the path inside the smaller ring.


The operation of the electronic circuit of this project is as follows: In order for the servo motors to move, the joystick module KY-023 must be actuated, which contains two internal potentiometers, one for each axis. The voltage received by the analog ports of the microcontroller, to which the pins VRx and VRy are connected, the voltage varies between 0 volts and 5 volts depending on the position of the joystick lever. The microcontroller should convert the analog signal of the received voltage into a digital signal. The AZ-Nano V3 microcontroller has a resolution of 10 bits for converting analog signals to digital signals, which means that it must convert analog signals from 0 to 5 volts of the position of each axis of the joystick to digital values from 0 to 1023. On the other hand, the travel of the servo motors is 180 degrees, so we need to scale the possible digital values of the joystick from 0 to 1023 to values between 0 and 180 degrees of the servo motors and map the value of the current joystick position to the corresponding value of the servo motor degrees, i.e. adjust the value on one scale to a similar value on another scale. We start by analyzing the scaleizze.

The only library included is servo.h This library contains the necessary methods for the microcontroller to use the servo motors. An object from this library is also implemented for each of the servomotors that will move the axes, through these objects we will control the servomotor that is necessary.
#include <Servo.h>
Servo servo_x_axis_movement;
servo servo_y_axis_movement;
The variables to be used for working with the joystick are defined in the following lines. The first two variables to be defined are used to specify the analog ports to which the pins of the X and Y axes of the joystick are connected. The analog port to which each axis of the joystick is connected is assigned as the value, the analog port 0 is assigned the VRx-pin of the joystick is connected to analog port 0 and the VRy-pin is connected to analog port 1.
int X_pin = 1;
int Y_pin = 0;
To save the current values of the X and Y axes of the joystick, a variable is defined for each axis that is not initialized with a value.
int val_x_axis;
int val_y_axis;
As explained above, the values of each joystick axis position vary from 0 to 1023, defining variables for the minimum and maximum values of each joystick axis, which are initialized with the corresponding values.
int x_axis_max_value = 1023;
int x_axis_min_value = 0;
int y_axis_max_value = 1023;
int y_axis_min_value = 0;
With the definition of the four preceding variables, the variable definition block is completed, with which the method setup() method is implemented. In this method, only the digital ports to which the individual servomotors are connected are defined; for the movement of the X-axis, the servomotor is connected to digital port 2 and the servomotor that will move the Y-axis is connected to digital port 3.
servo_x_axis_movement.attach(2);
servo_y_axis_movement.attach(3);
At the beginning of the loop()-method, the voltage of the pins of each axis of the KY-023 module is first measured with the command analogRead(axis_pin) is read via the analog ports of the microcontroller, then the received analog voltage between 0 and 5 VDC is converted internally into a digital value between 0 and 1023 and stored in the corresponding val_name_axis-variable of each axis. The lines of code are:
val_x_axis = analogRead(X_pin);
val_y_axis = analogRead(Y_pin);
As soon as the analog value has been converted to a digital value, double conditions if - else if are implemented to check the value of each axis. As can be seen in the joystick illustration above, the joystick is at rest in the center of each axis and has digital values of approximately 511 on each axis. In the condition when the expression val_x_axis > 511 checks whether the value read and stored in the variable val_x_axis variable is greater than the center of the digital scale. If this expression is true, the command block is executed in its keys.
if (val_x_axis > 511) {
. . .
. . .
}
The first line of the block changes the value of the variable x_axis_max_value of the maximum value of the scale of the digital values of the X axis, this is done to speed up the response of the movement of the X axis servomotor towards its new position, the higher the value of the joystick position, the lower the maximum limit we remember, 1023, so that the time required for conversion and mapping is less. We subtract the digital value of the variable val_x_axisvariable, which is the current value of the joystick's X-axis, from the maximum value of the digital scale, which is 1023 and add the average value (511) of the digital scale. The new value of the upper limit is stored in the variable x_axis_max_value variable. In the second line of the block, the lower limit value is set to zero, as the servomotor of the X-axis should not move in this direction, as the current position of the servomotor should not decrease.
x_axis_max_value = 1023 - val_x_axis + 511;
x_axis_min_value = 0;
If the condition if is false, your statement block is not executed and the else if statement check is performed, which checks whether the value of the X-axis position stored in the variable val_x_axis is less than 511 with val_x_axis < 511if this condition is true, the statement block is executed within its curly brackets.
else if (val_x_axis < 511) {
. . .
. . .
}
Within the command block, the first line in the variable x_axis_max_value variable stores the upper limit of the digital scale with its maximum value of 1023. As the current value of the joystick's X-axis position is below the center of the scale, the current value is stored in the variable x_axis_value variable from the center of the scale (511), whereby the value of the lower limit is increased, less time is available for the conversion and mapping and the response time of the X-axis servomotor is accelerated. The value of the new lower limit is stored in the variable x_axis_min_value variable.
x_axis_max_value = 1023;
x_axis_min_value = 511 - val_x_axis;
The steps to change the position of the Y-axis servo motor when the joystick is moved in this axis are similar to the X-axis, just change the names of the variables to val_y_axis, y_axis_max_value e y_axis_min_value
if (val_y_axis > 511) {
y_axis_max_value = 1023 - val_y_axis + 511;
y_axis_min_value = 0;
} else if (val_y_axis < 511) {
y_axis_max_value = 1023;
y_axis_min_value = 511 - val_y_axis;
}
Once the values of the joystick position and the upper and lower limits of the joystick axes have been determined, they must be converted into valid values for the servomotors, i.e. the values of the joystick scale limits must be scaled and the value of the joystick position in its axes must be mapped into valid values for the position of the servomotors, i.e. the digital values of the joystick position must be converted into the values in degrees of the servomotor positions, everything explained is done with the function map (joystick position value, minimum joystick limit, maximum joystick limit, minimum servo motor position, maximum servo motor position) and the resulting value of this function is the position in degrees at which the servo motor must be positioned, which is stored in the variable val_x_axis in order to use it as a parameter in the function servo_x_axis_movement.write the servo motor to position itself. The minimum and maximum values of the joystick are the values obtained by the conditions related to the position of the joystick, while the minimum and maximum values of the servo motor are the values between which the servo motors move.
As already mentioned, the command servo_x_axis_movement.write (val_x_axis) is used to move the servo motor to the position in degrees that corresponds to the joystick position, where the value of val_x_axis is the number of degrees of the position to which the servomotor must move.
val_x_axis = map (val_x_axis, x_axis_min_value, x_axis_max_value, 87, 93);
servo_x_axis_movement.write (val_x_axis);
We have analyzed the scaling and mapping for the movement of the X axis, for the Y axis it is done in a similar way, you just have to change the names of the variables to put the servomotor of the Y axis in the corresponding position, its code is as follows.
val_x_axis = map (val_x_axis, x_axis_min_value, x_axis_max_value, 87, 93);
servo_x_axis_movement.write (val_x_axis);
VIDEO
We hope you enjoy building this project and that you can change the route of the maze and increase or decrease the level of difficulty.


1 commentaire
Uwe
Statt Pappe einen 3D Druck?