In today's blog we want to program the AZ-Touch module so that it can be used as an Advent calendar with daily sayings or jokes to make your pre-Christmas time more varied.
In this case, the content behind each “door” is not chocolate, but can be customized by you as you wish to create a personal Advent calendar.
Hardware
All you need is:
a AZ Touch Set (2.8” recommended)
and a ESP32 DevKit C
So that you can successfully implement the project, you now only need to use the AZ-Touch, as in the Instructions described, assemble and plug the microcontroller board into the socket strips.
Software
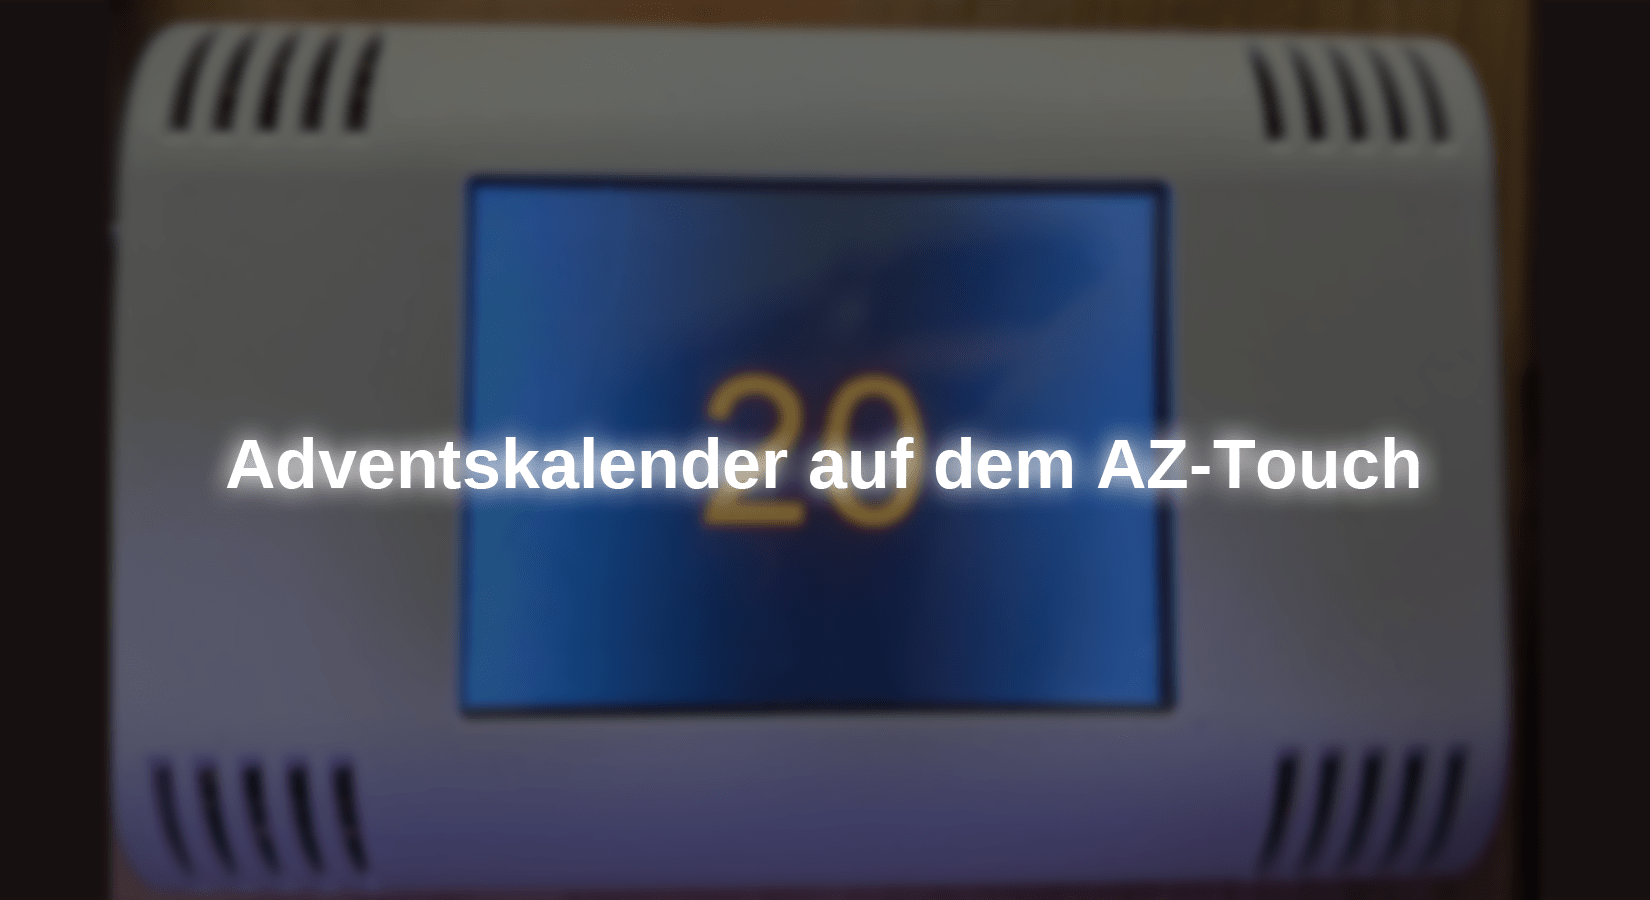
The Advent calendar should first display the door number and then the stored text after touching the screen.
Since the ESP32 Wroom 32 about 4MB If it has flash memory, the 24 texts can be stored directly in the program.
Driver
If this is your first time programming an ESP32 in the Arduino IDE, copy the following link in the Arduino IDE at:
File->Preferences->Additional boards manager URLs: https://dl.espressif.com/dl/package_esp32_index.json
and install the ESP32 package in the board administration.
The driver (CP2102) for this board is already installed by the operating system.
Libraries
Next, the required libraries must be installed:
TFTeSPI is required to control the display.
NTP Client always delivers the current date via an ntp server.
The libraries can be downloaded as .zip using the links above and added in the Arduino IDE under Sketch>Include Library>Add .ZIP Library…. Alternatively, this can easily be done using the library manager integrated in the Arduino IDE.
Code
Next comes the step-by-step programming of the microcontroller.
To get started we need a program that shows the number of the current door in the middle of the display.
In order for the library to be able to communicate with the display, a configuration in the library is necessary.
The TFTeSPI library has the special feature that the entire configuration is carried out in one file. This UserSetup.h file must have the following configuration for the AZ-Touch Set:
|
#define USER_SETUP_INFO "User_Setup" |
So that you don't have to copy the contents completely, you can also here download.
Now to the actual method, which should display the number in the middle of the display:
(In the following example excerpts, the library integration and the object creation via the constructor are missing. These have been omitted for improved clarity. Use the final program for testing!)
|
void showNumber(int number) { |
Explanation:
At the beginning, the number passed to the program is converted into a character string (string) converted (casting).
The display is then prepared by setting the pixels to black, the font color to red and the font to 8.
Then the coordinates are calculated. The X coordinate is made up of the difference between half the display width and half the text width. The y position is described by the difference between half the screen height and half the font height.
Finally, the number is placed at the calculated position via the println() command displayed.
The door number can now be shown in large size on the display. Next we want to determine the date via the program so that we can always display the current door.
An RTC module offers a widespread option here. However, these have to be set manually using the software and can show inaccuracies after some time.
Since we use an ESP32 in the project, the WLAN function can easily be used to query the current time and date via a so-called NTP server. This one Network Time Protocol server are based on real-time clocks, such as atomic clocks.
For the simplified query the NTP Client Library can be used.
|
int day, mon; |
Explanation:
First the time is updated by the server. Afterwards this time Object read out and inserted Struct converted.
The day and month are then read from this struct and stored in the corresponding global variables.
Now they follow setup() function and the loop() Routine:
|
void setup() { |
Explanation:
In setup() the initialization takes place serial interface, des Displays, des WiFi and des timeClients (NTP).
In the loop() As a routine, the date is first queried and, based on a case distinction, either a countdown to Advent is displayed, or if the month corresponds to December and the day is between 1 and 24, the corresponding door number is displayed showNumber() Function.
The touchscreen has an interrupt pin, which switches to LOW when pressed. This means that touching the screen can be done easily with one without additional software digitalRead() query can be checked.
After touching, the content on the display will be with the text from an array String elements filled. Here, so that longer texts can be displayed, the starting point was set to 0:0, i.e. the top left corner. The line break is then automatically continued on the next line.
You can do the entire project here download.
To load it onto the microcontroller, in the Arduino IDE select:
Tools > Board > esp32 > ESP32 Dev Modules
and then the right one serial port.
If multiple ports appear, unplug the microcontroller and reconnect it, the new port that appears is that of the microcontroller.
For advanced users:
Can you get the signal generator pre-installed in the AZ-Touch to play Christmas music while waiting for a display to be touched?
TIP: Use them Tone commands to pin 21. [tone(21, 1000, 100);]
For complex melodies the TinyRTTTL library a simple solution.
Conclusion:
In this project you built an Advent calendar from an AZ-Touch module, which can show you Christmas sayings, jokes or personalized text every day.
Now it's time to collect content for every day!
Of course, you still have further scope for creative software changes, which will make the Advent calendar even more personal! :)
Have fun replicating it :)


4 comments
Rainer
Leider bin ich kein Programmierer und komme somit so nicht zum gewünschten Ergebnis.
Die ino-Datei habe ich geladen und der ESP verbindet sich auch mit dem Netzwerk. Das Display bleibt aber bis auf ein kurzes Aufblitzen nach dem Neustart dunkel. Nun stellt sich mir die Frage ob bei dem 2.4" Display andere Pin-Zuordnungen notwendig sind. Würde mich freuen, wenn mir jemand einen Tip geben kann.
Chris
It’s eqaul what I try, it doesn’t work. The tft is allways white.
Henning Lühken
Leider produziert das Skript so eine Reihe Fehlermeldungen:
Adventskalender:40:1: error: ‘WiFiUDP’ does not name a type; did you mean ‘WiFi’?
40 | WiFiUDP ntpUDP;
| ^~~~~~~
| WiFi
Adventskalender:42:22: error: ‘ntpUDP’ was not declared in this scope
42 | NTPClient timeClient(ntpUDP, “pool.ntp.org”, 3600*2, 60000);
| ^~~~~~
Birger T
Nette Idee und gute Beschreibung, aber leider fehlen die Witze und Sprüche im Projekt ;(
Espressif hat die Arduino ESP API so verändert, dass viele Anleitungen nicht mehr funktionieren (u.a. Hallsensorabfrage gibt’s nimmer); siehe hier:
https://forum.arduino.cc/t/esp32-compilation-failes-libraries-outdated-toneesp32/1409301.
Vielleicht als Anregung für die Zukunft: Bitte die verwendeten Softwareversionen für Boards und Libraries mit in den Sketch einfügen. Vielen Dank im Voraus.
Wäre auch eine nette Ergänzung zu den bisher veröffentlichen az-Touch Projekten, so als Terminkalender für Geburtstage, Müllabfuhr, Aussaat im Garten etc.
Viele Grüße und Danke